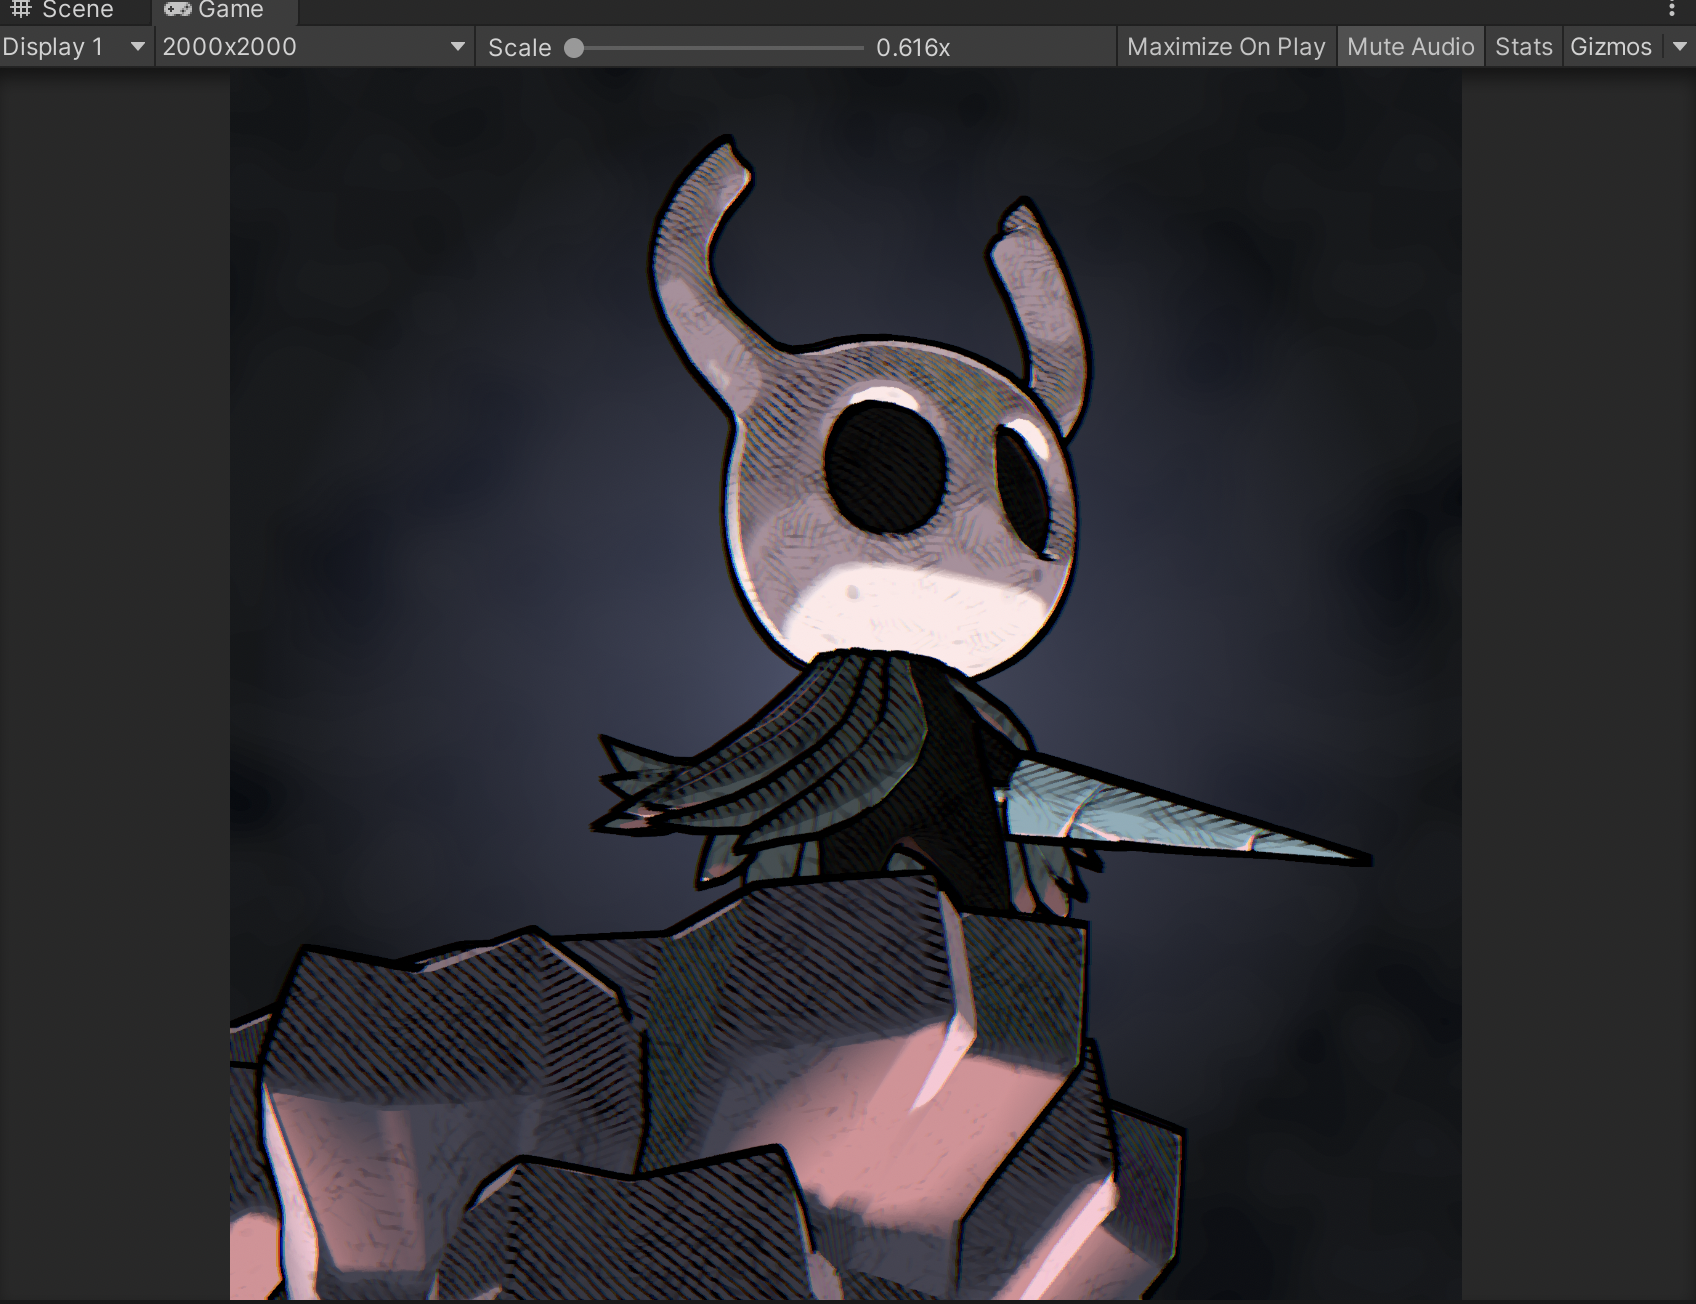
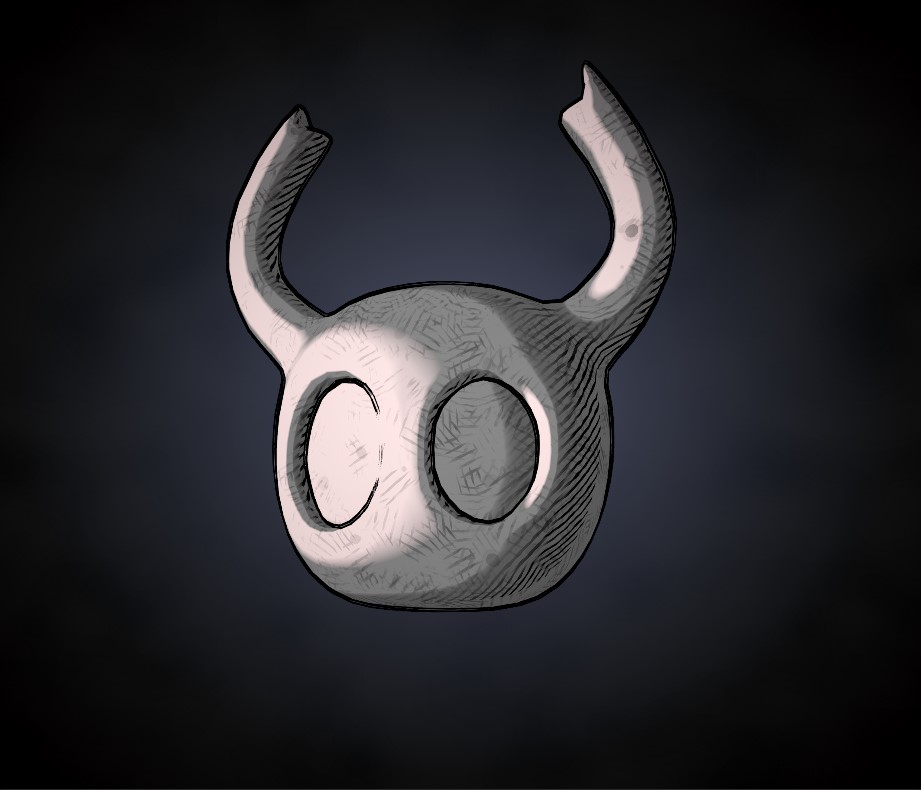
If you saw this Hollow Knight fan-art from me before and thought: wow I wonder how the hatching effect was made! This article is for you 🐁
Disclaimer: I made this a couple years ago in 2020, maybe I wouldn't do it the same way today but I want to share it anyway. I was also made only for 3D illustration purposes and not a game.
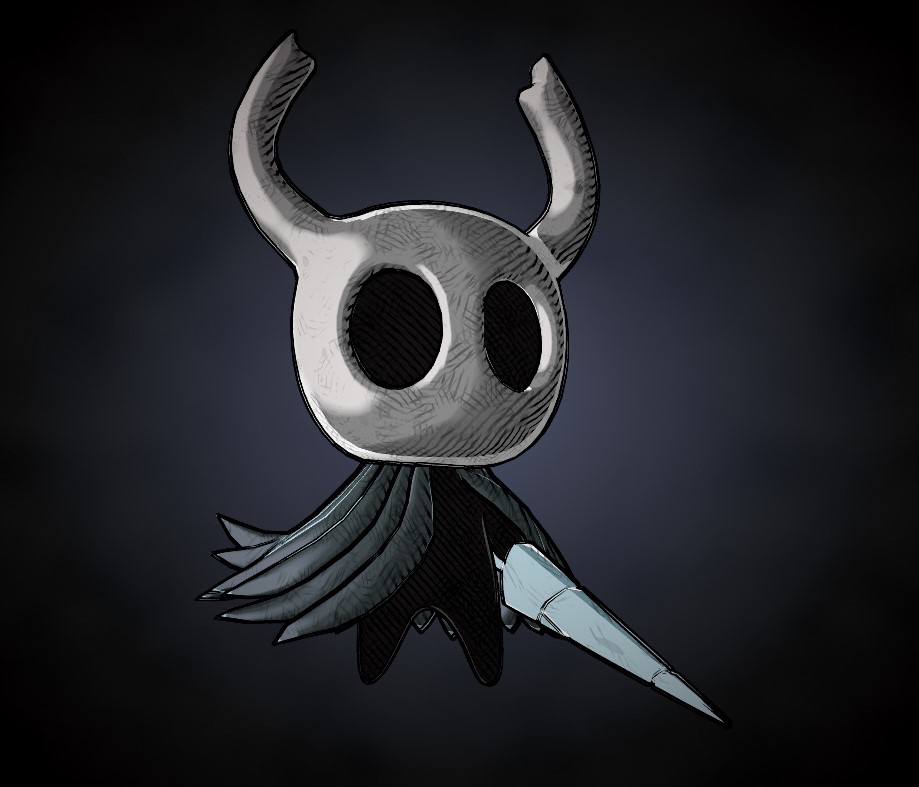
The final visual is a combo of a shader I made and an outline post effect. It was made in Unity using Amplify Shader, a node-based shader creator plugin. I believe it can be made using shader graph in Unity, or even in other softwares, if you find similar nodes.
Let's go!
The first step was finding a good looking outline post effect for Unity. I usually don't like the ones that just invert and push your model because it will always have visual artifacts around intricate parts.
I ended up finding this post process project on GitHub from candycat1992 and more specifically the Pencil Contour shader which seemed perfect for my needs.
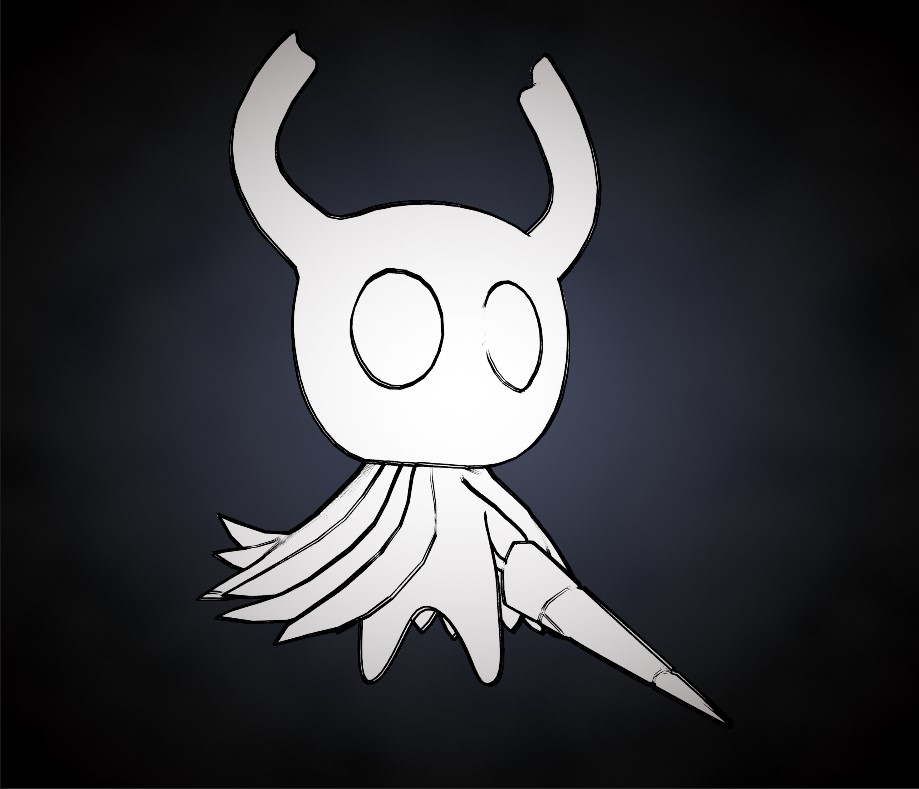
Showing the Pencil post effect only.
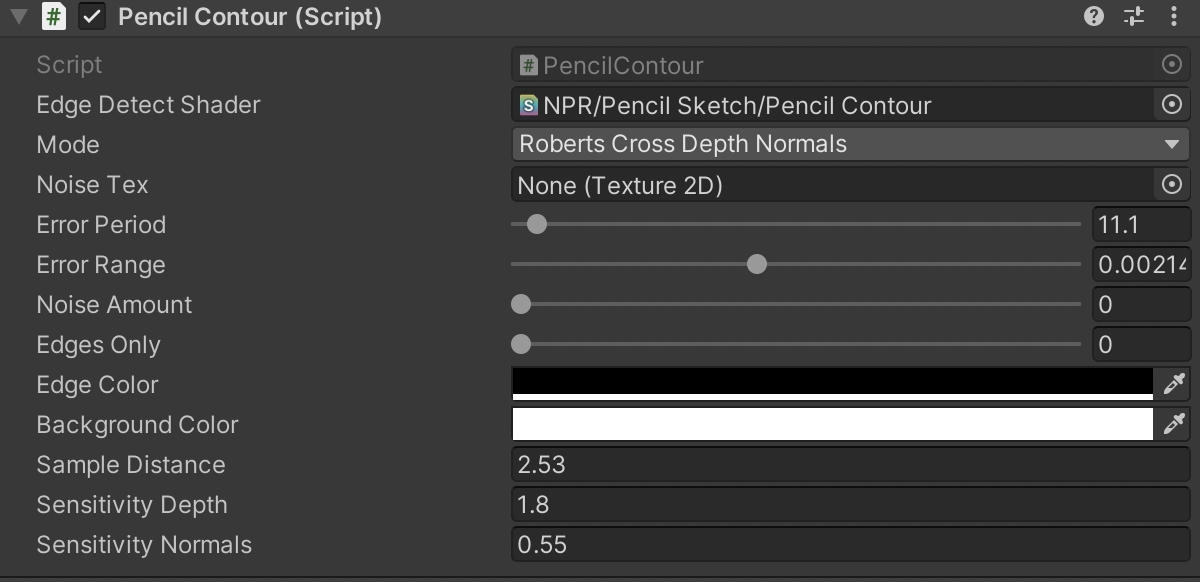
The shader has to be attached on a script on your camera and has a couple of options to tweak it to your liking:
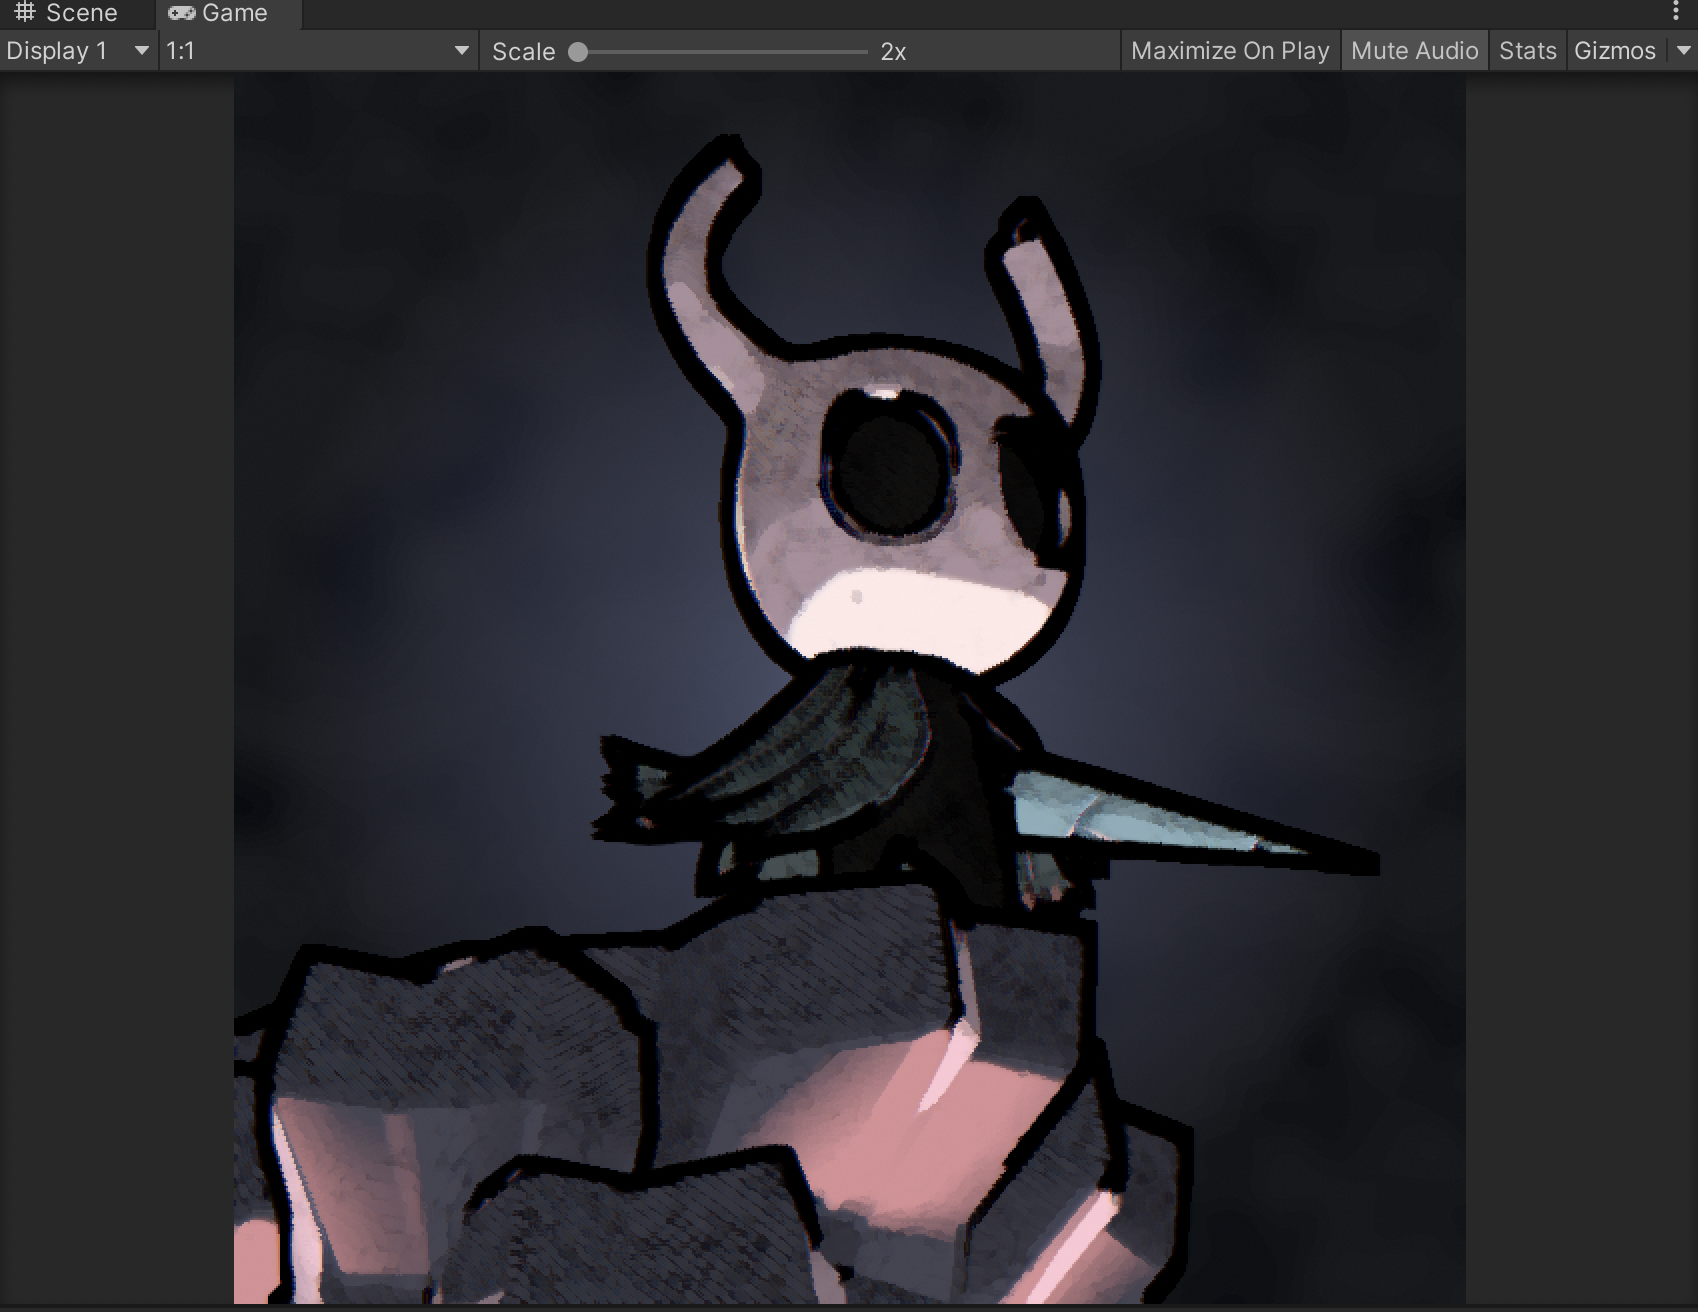
Beware that the Sample Distance option that allows you to tweak the thickness of the outline depends on your game view resolution. Here is an example below between a game view using a 1:1 aspect ratio and a game view with a fixed resolution of 2000x2000px. Both of them using the same value in the shader.
I cannot comment on the performance results of this post process as I am only using it for 3D illustrations.
Now let's talk about the shader!
Little preface: I'm going to often refer to a node result as a "mask". Shader math operation gives you numerical values and those are shown on the 3d model as color or black & white values, which make it looks like a texture mask. I find it easier to refer to it as is.
The first step was to get light information in the shader. I added a directional light beforehand to my scene I will only need it's direction information in the shader. The directional light color or intensity does not affect the shader (except if you set it to 0).
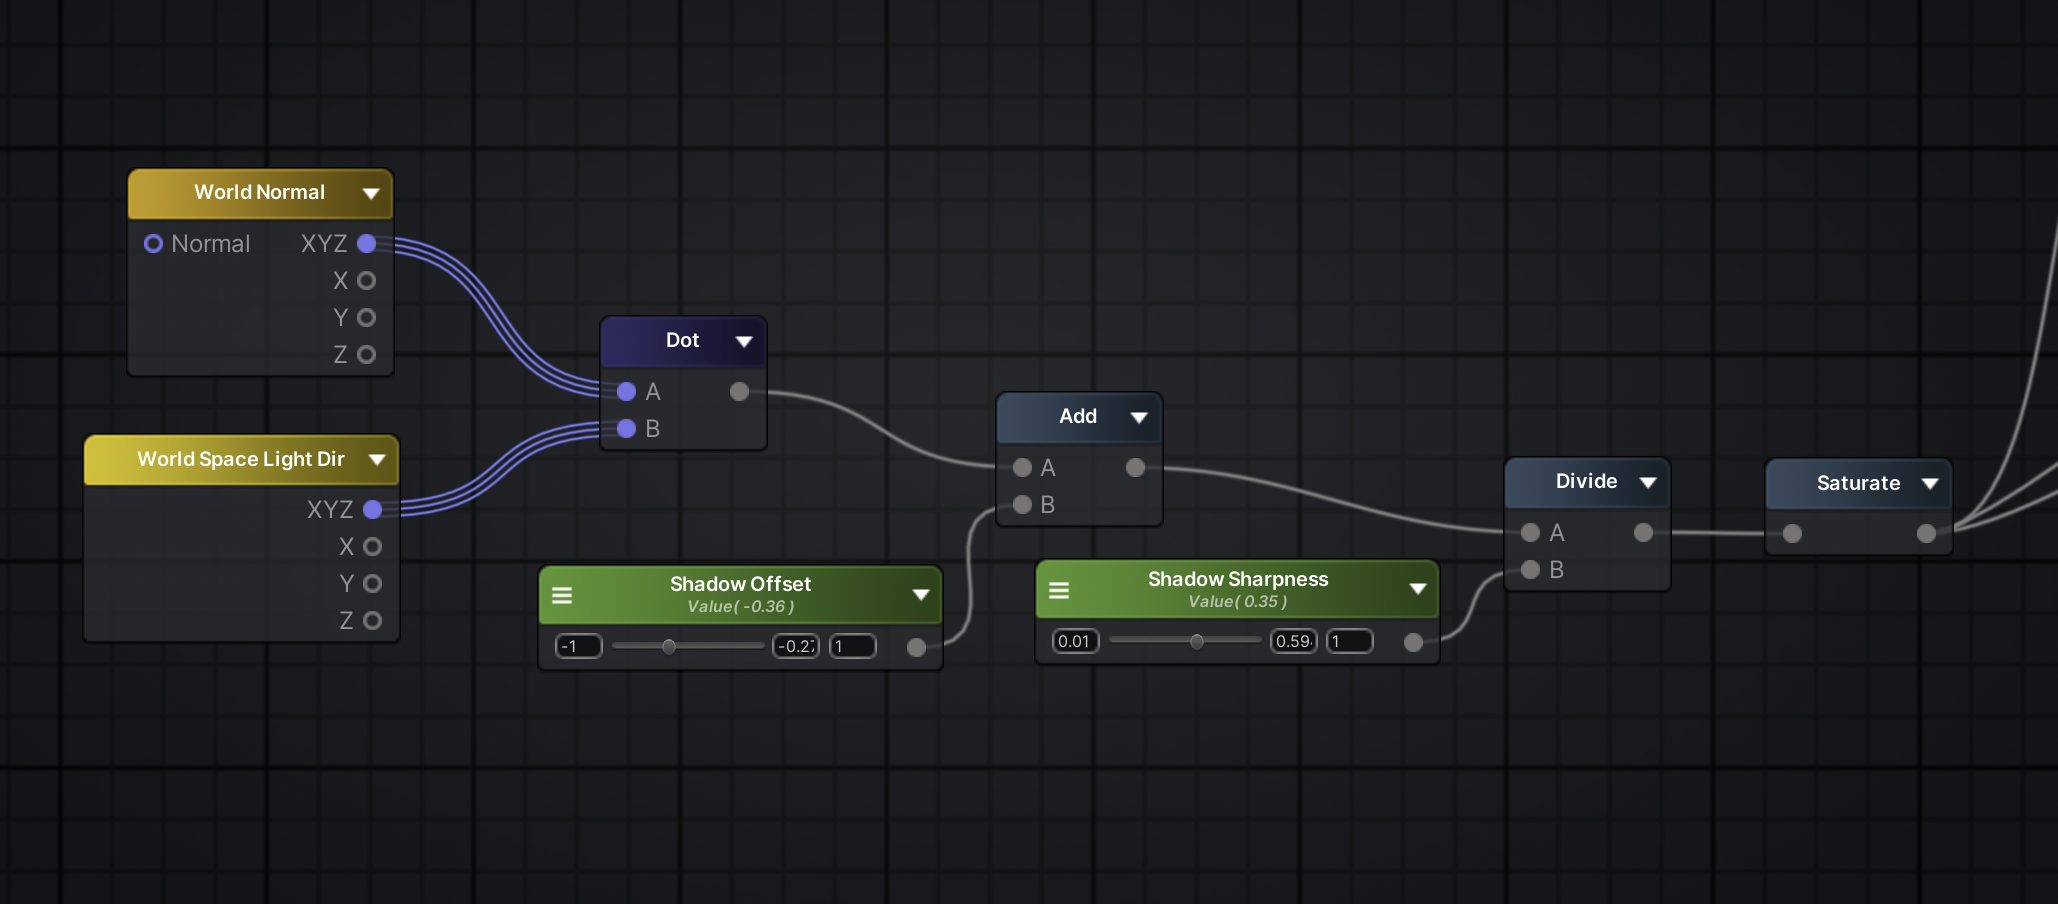
The first step was a dot product between the world normal and the directional light direction. I also added two float sliders to change the offset and sharpness to add more control.
Wow, visual nodes!
Roughly, what the dot does is that it compares two vectors and output the angle difference value between the two of them. If the angle is too high it'll appear as dark on our mask.
By inputting the light orientation and the model normals directions to the node we gather information of where the model is in shadow.
There are way more complicated math behind that, but for what we're doing and using we only need to understand surface stuff!
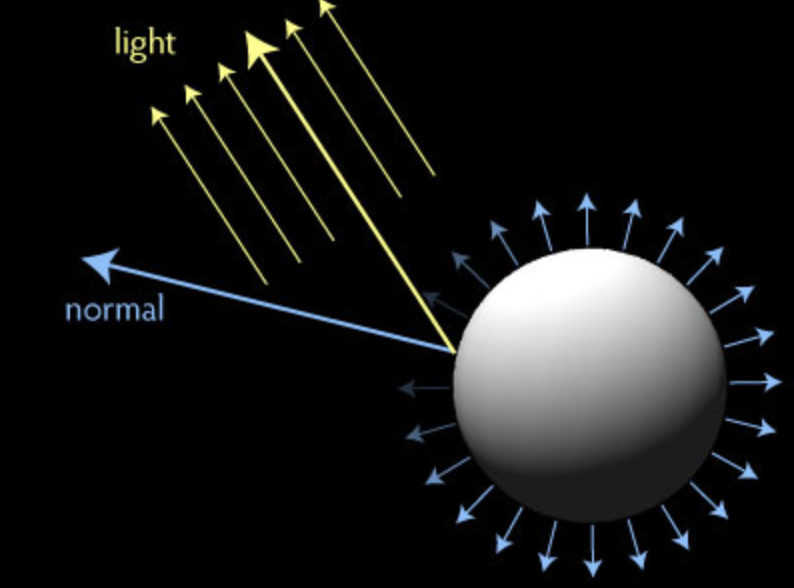
Image from: https://www.oogby.com/2014/06/30/writing-unity-surface-shaders-diffusion-and-dot-products/
After that dot, I add a float slider with a range from -1 to 1 to the result, called Shadow Offset. It's moving the shadow by adding black (-1) or white (1) values to the dot end result.
The Shadow Sharpness is made by dividing the mask values by a float between 0.01 and 1. I'm using the division operation as a mean to extrapolate the black and white values of the global mask, since our dot is calculated from vectors the value range can be for example from -100 to 1000. Dividing those numbers by a smaller value like 0.01 will greatly eliminate any value in between.
After those two operation, I added a saturate, it clamps any value between 0 and 1. Since I'll be adding more nodes after, I prefer to keep clean values.
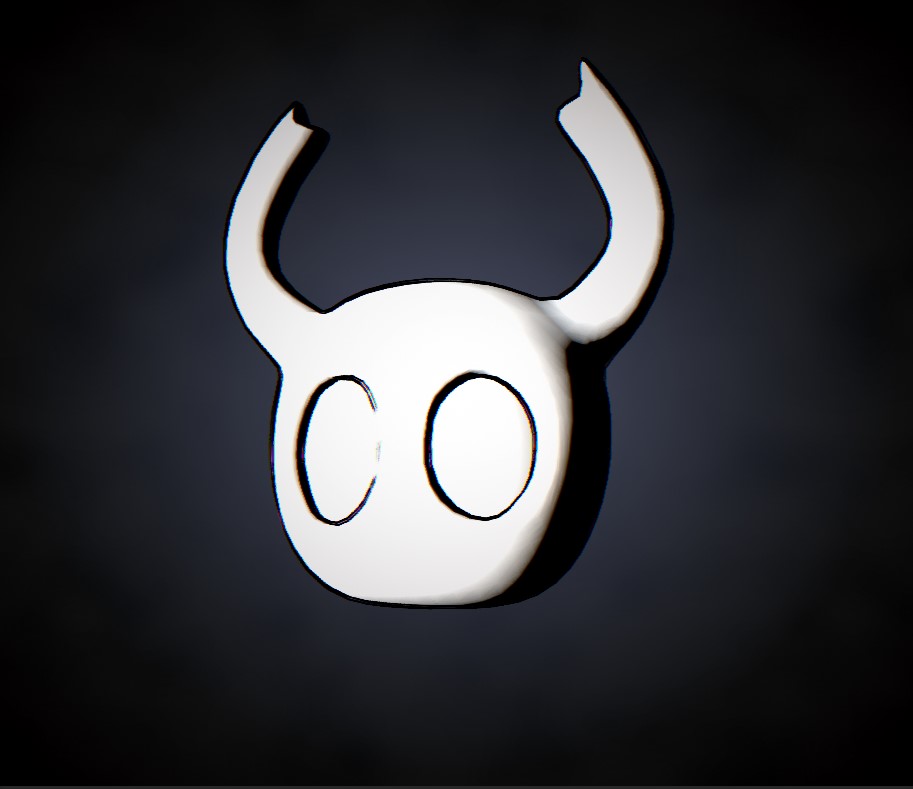

Left: Shadow Sharpness value at 1. Right: Shadow Sharpness value at 0.01.
Now that I have a mask separating the shadow and light, I'm going to use it to display hatching in the shadows.
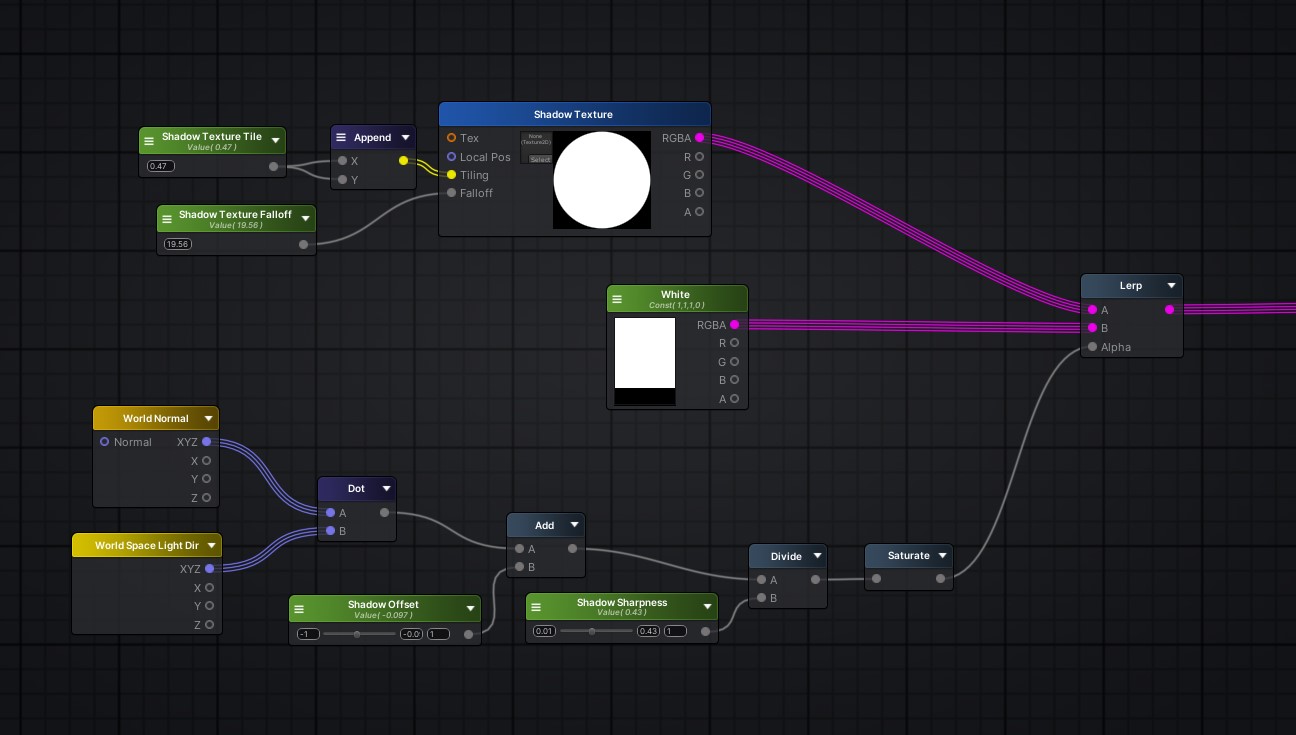
The bottom part is what I showed just before, leaving it on the screen to show where it's going to be linked.
I'm going to do that using a lerp node. It will blend two input together using a value as a mask. Input A is shown where alpha is equal to 0 (black) and input B where alpha is equal to 1 (white). I am using my dot mask to blend together a white color and the hatching texture.
The hatching texture is mapped on the mesh using a triplanar sample node. I added values to control the tiling and the falloff (the falloff value control the blend between the different projection planes).
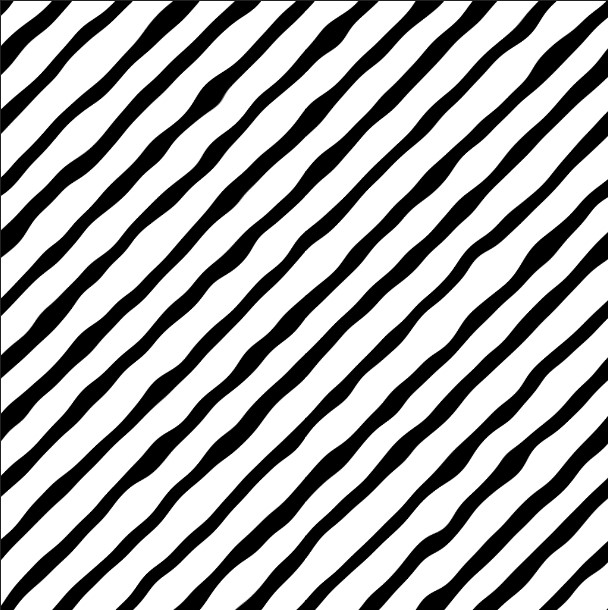
The texture used for the projection and the result on the mesh.
Small step before adding highlights: multiplying a color to the previous result so I can tint the material. I also added a couple of nodes to darken the color where the hatching shadows are displayed.
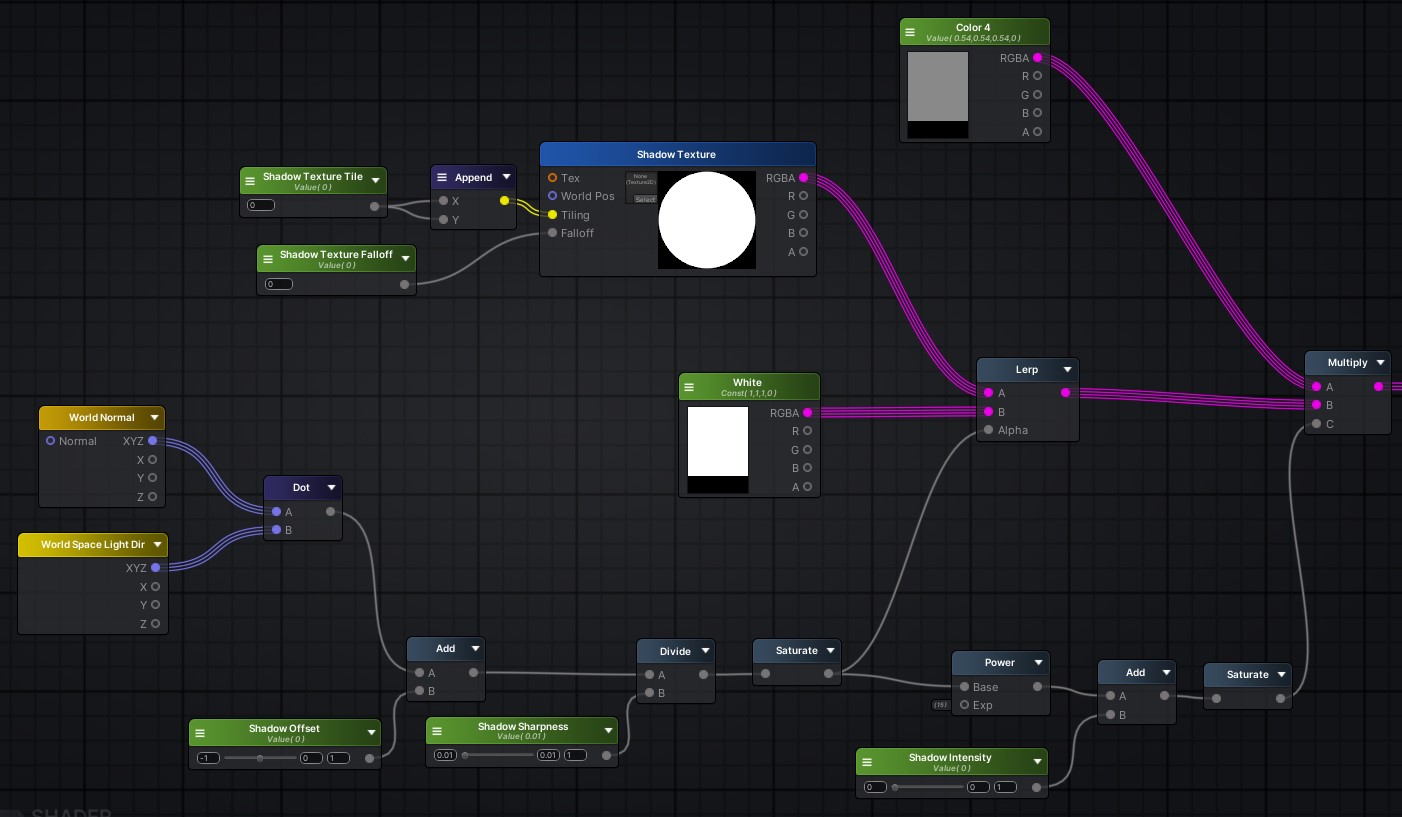
Pretty node graph.
I used a power node to sharpen my mask (it acts as a multiplier), then I added a node with a slider so I can control the darkness of the shadow color.
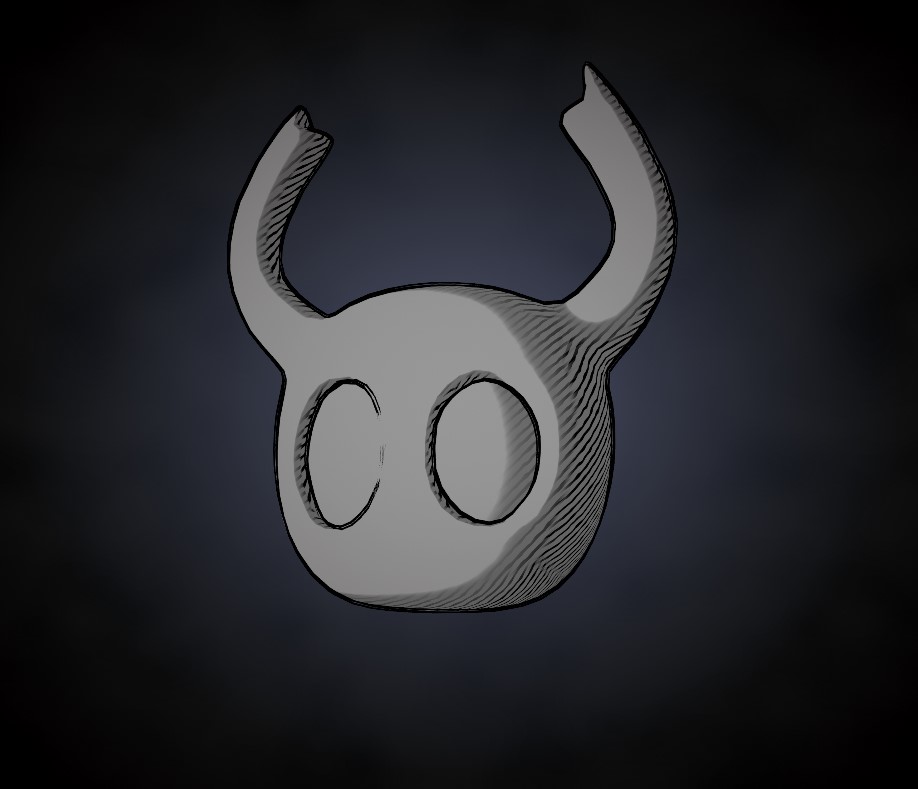
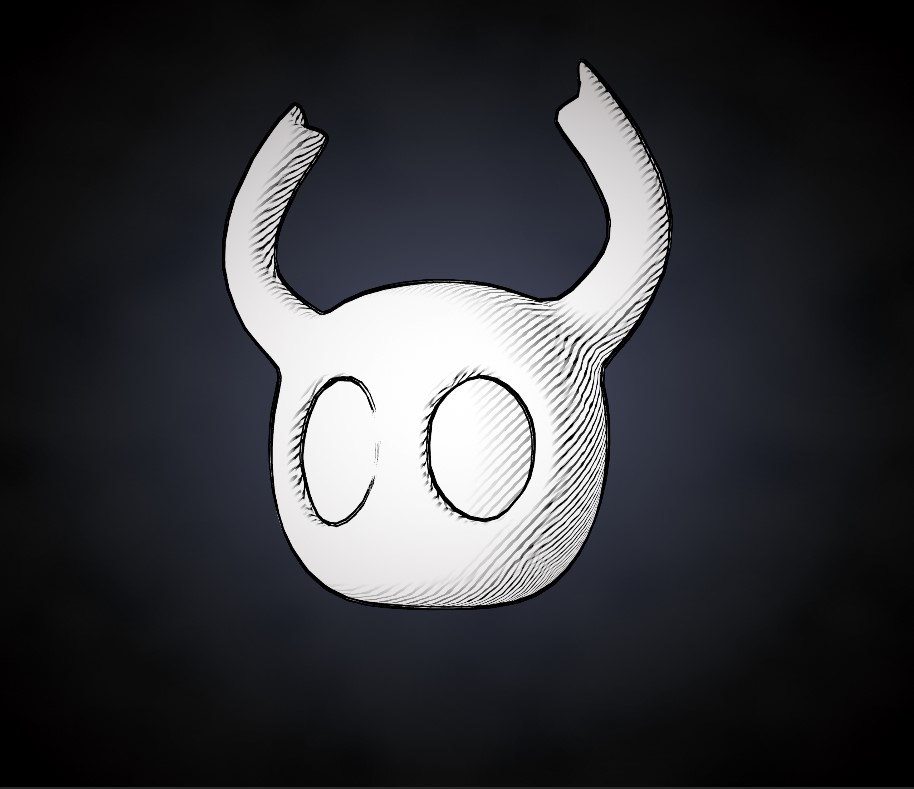
Simple but looking good!
Now it's time for some highlights! Using the dot product I initially made (I copied the node over just for the sake of the screenshot), I'm creating two new float sliders to control the sharpness and offset, exactly like the first step. Then, I used a lerp to add a brighter color in that mask only.
Almost the same process as the first steps.
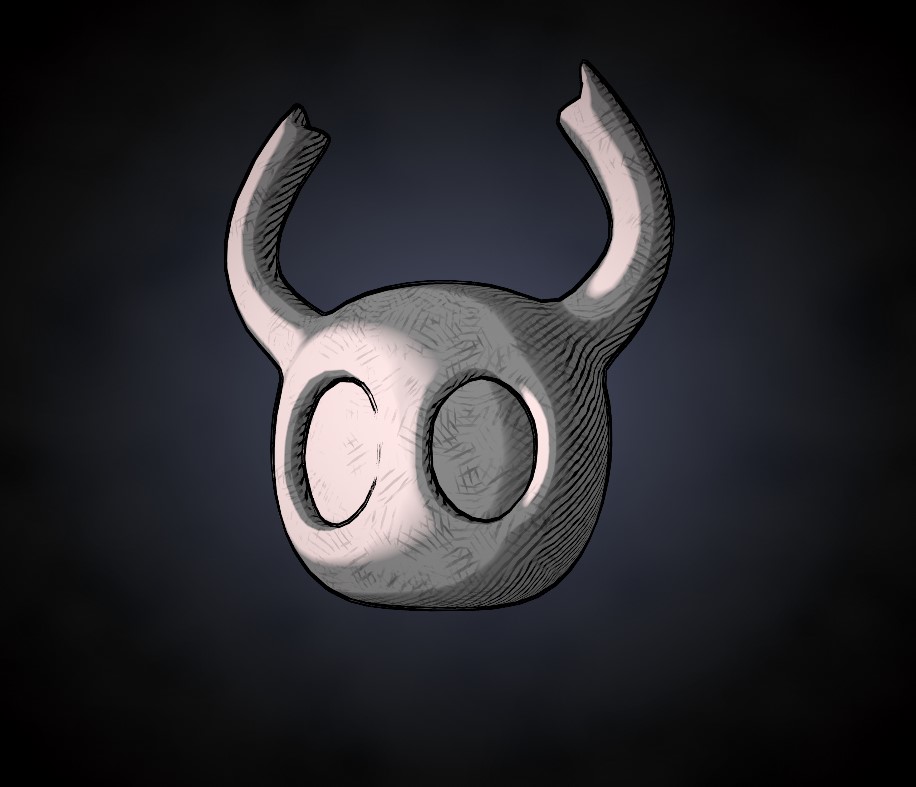
It looks very neat now, but we still have a lot more details we can add to make it look even better.

Progress, progress.
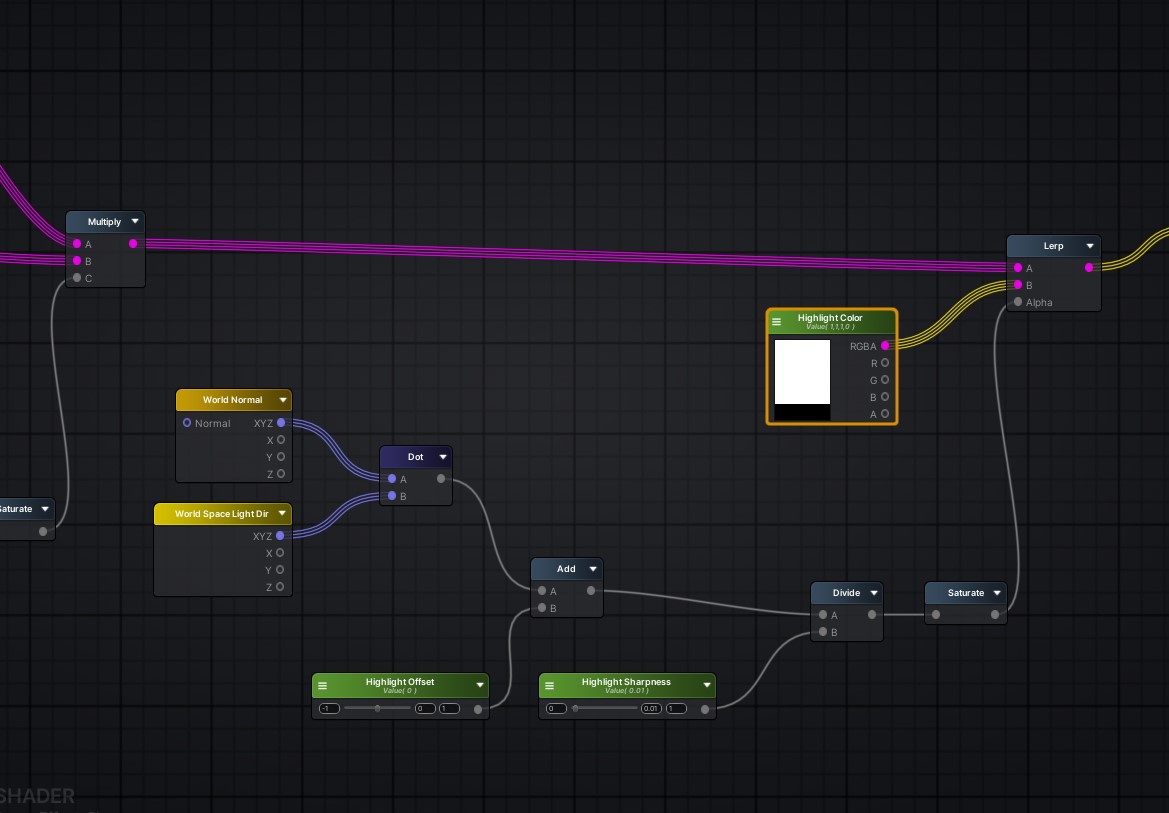
I wanted to add details to model area that are not in shadow, by using a more subtle hatching texturing.
I added two triplanar nodes (for convenience as I didn't want to do UV mapping, this is not required to use triplanar): one for the hatching texture and one for a noise mask to erase it so it doesn't look too strong and even on the model.
I added a float slider with an add to the hatching texture triplanar (the one on top) to be able to control the intensity of the hatching texture. Then I add both of them together, as well as the first mask we created for the shadows using the dot product, but inverted with a One Minus. That way we'll erase the detailed hatching when it is under the hatching shadows.
More triplanar?!? Don't judge me...
Going back to the first mask with a dot product, link the saturate to the one minus on the upper graph.
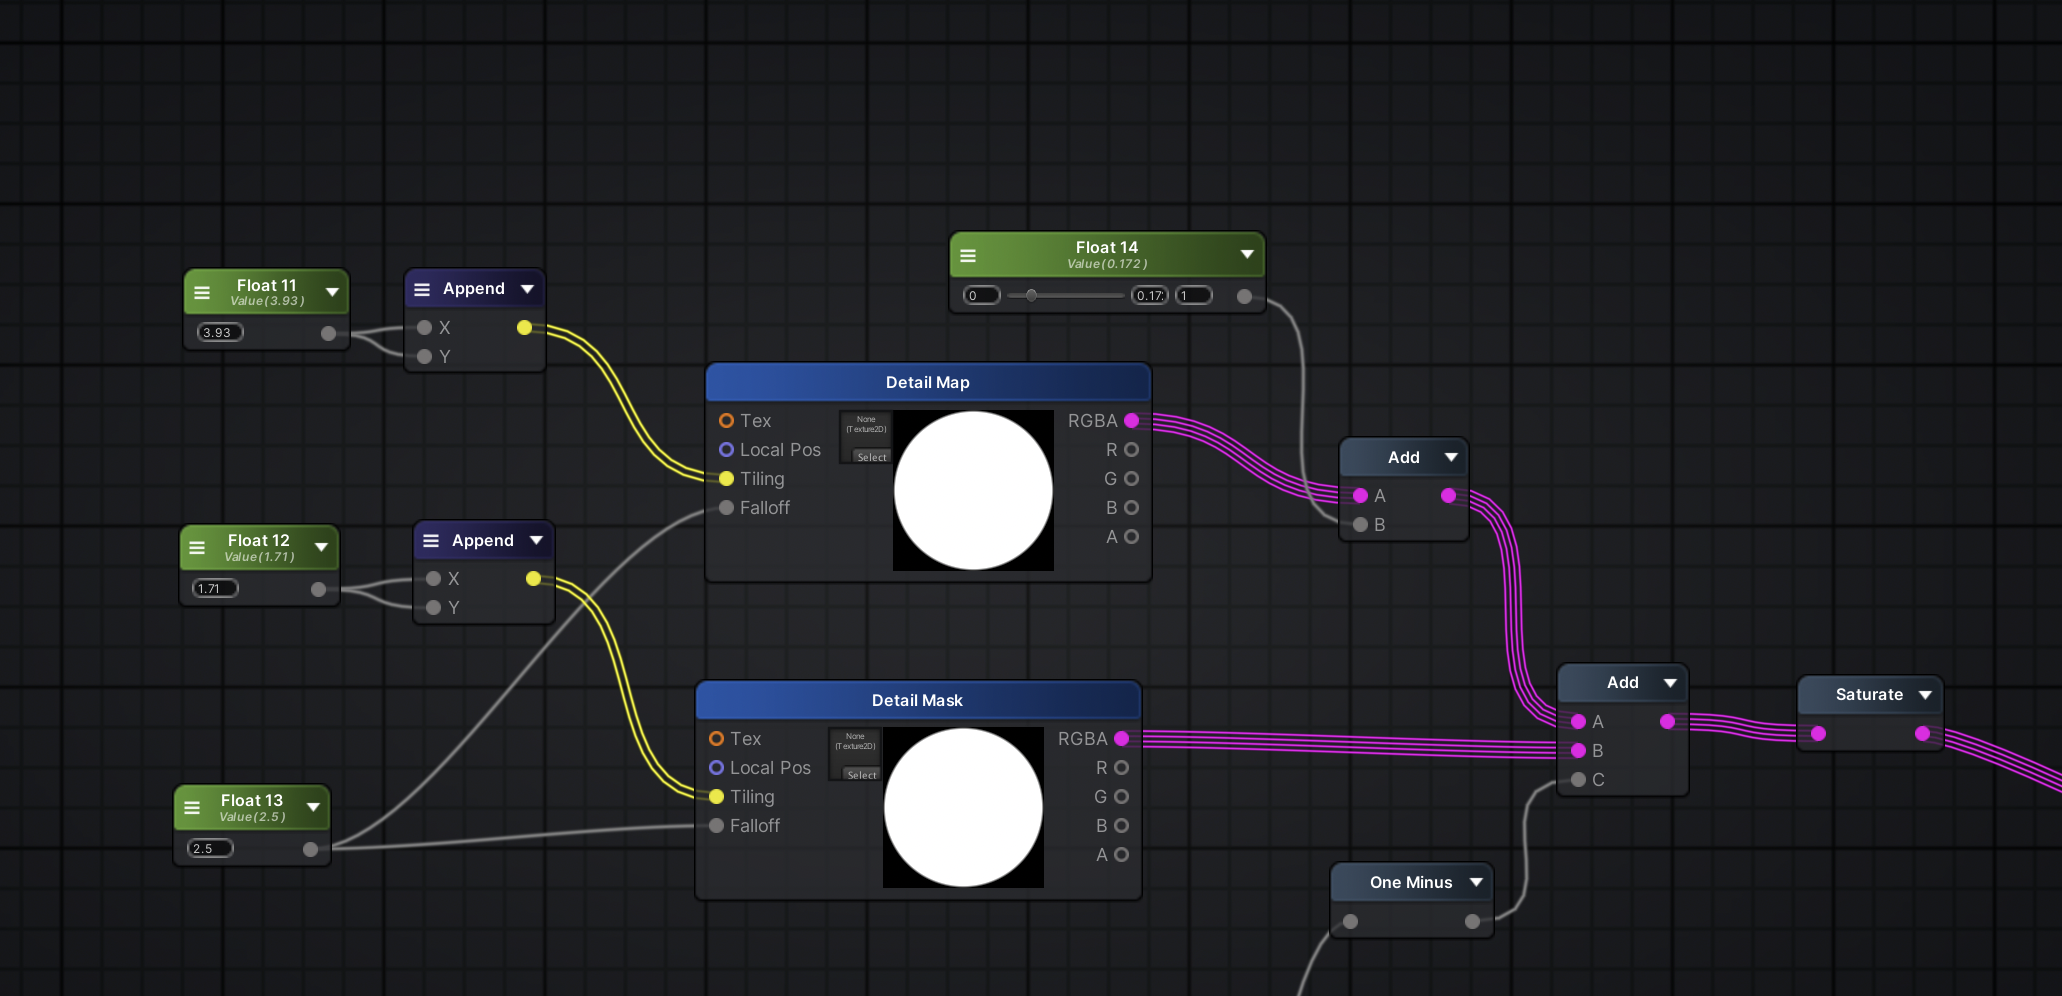
Now I have something that looks like this. NEAT but I can add more details! Also, below are the textures I used for the detail hatching and the noise mask.
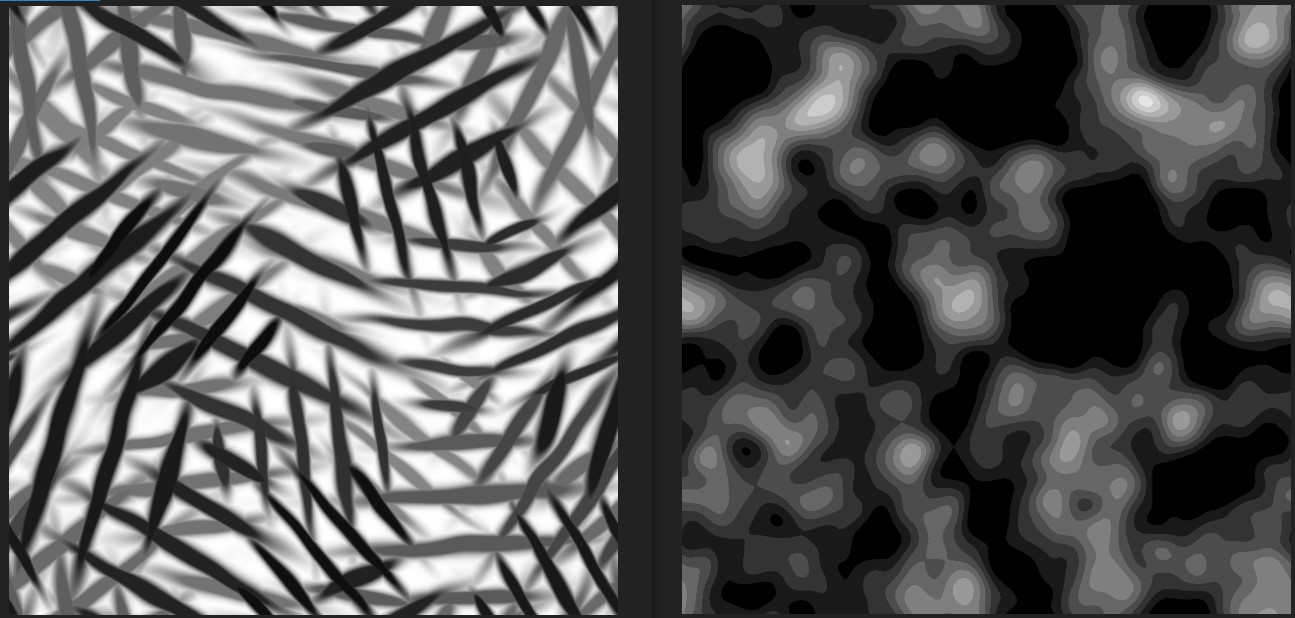
Looking sweet.
Adding one last triplanar to the mix (I'm sorry this is so so convenient to use LOL), so I can multiply some ink spots everywhere on the model. I just multiplied it at the end of everything. For the falloff slider I just used one I previously made.
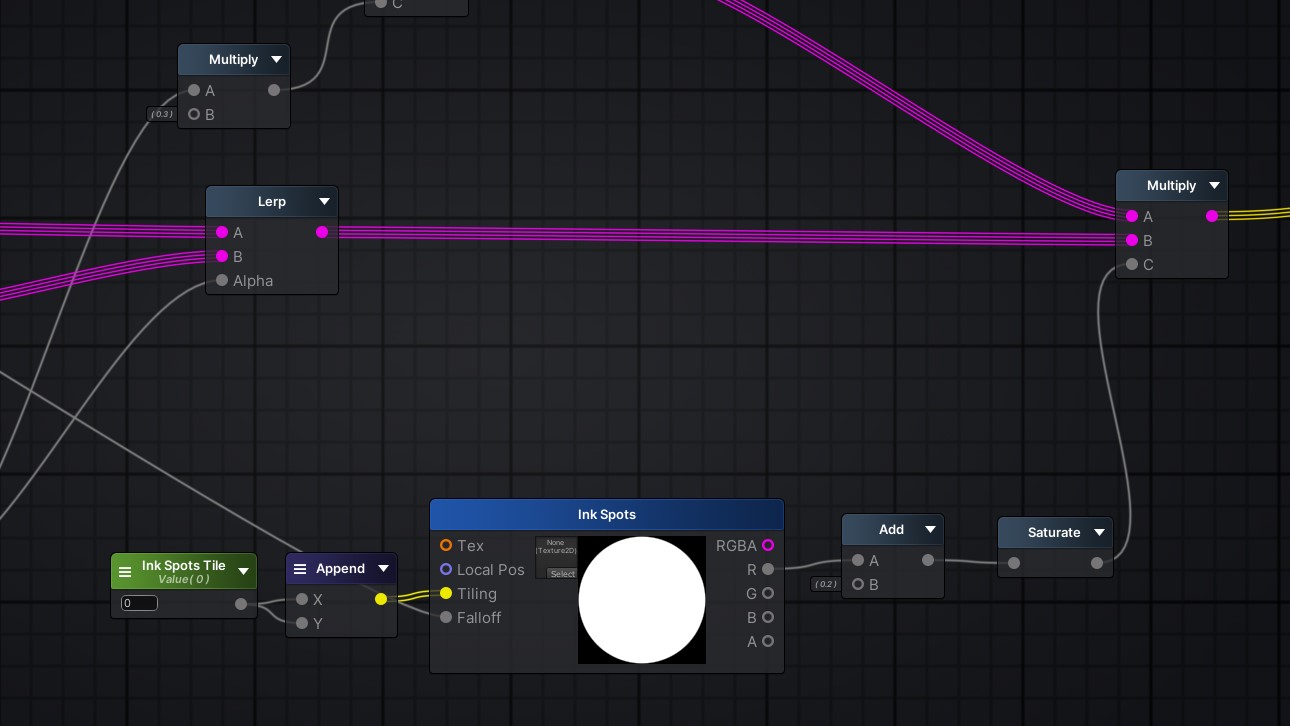
Will it be the last triplanar?
Here is the model and the ink spots. Only one last step and the shader will be done!

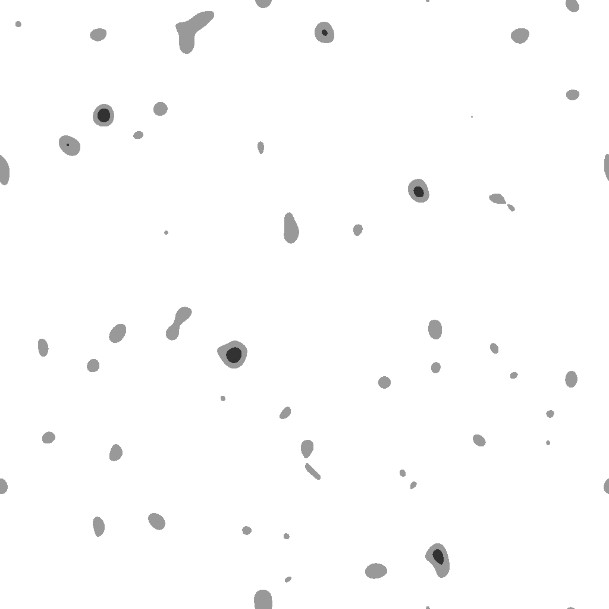
Sorry it's very subtle on this screen. Look at the right horn, here is a spot!!
The last detail I want to add in the shader is a rim light. First step will be to erase the hatching shadows where the rim light will be. I went back at the start of the shader and added a tighter fresnel to the first dot mask.
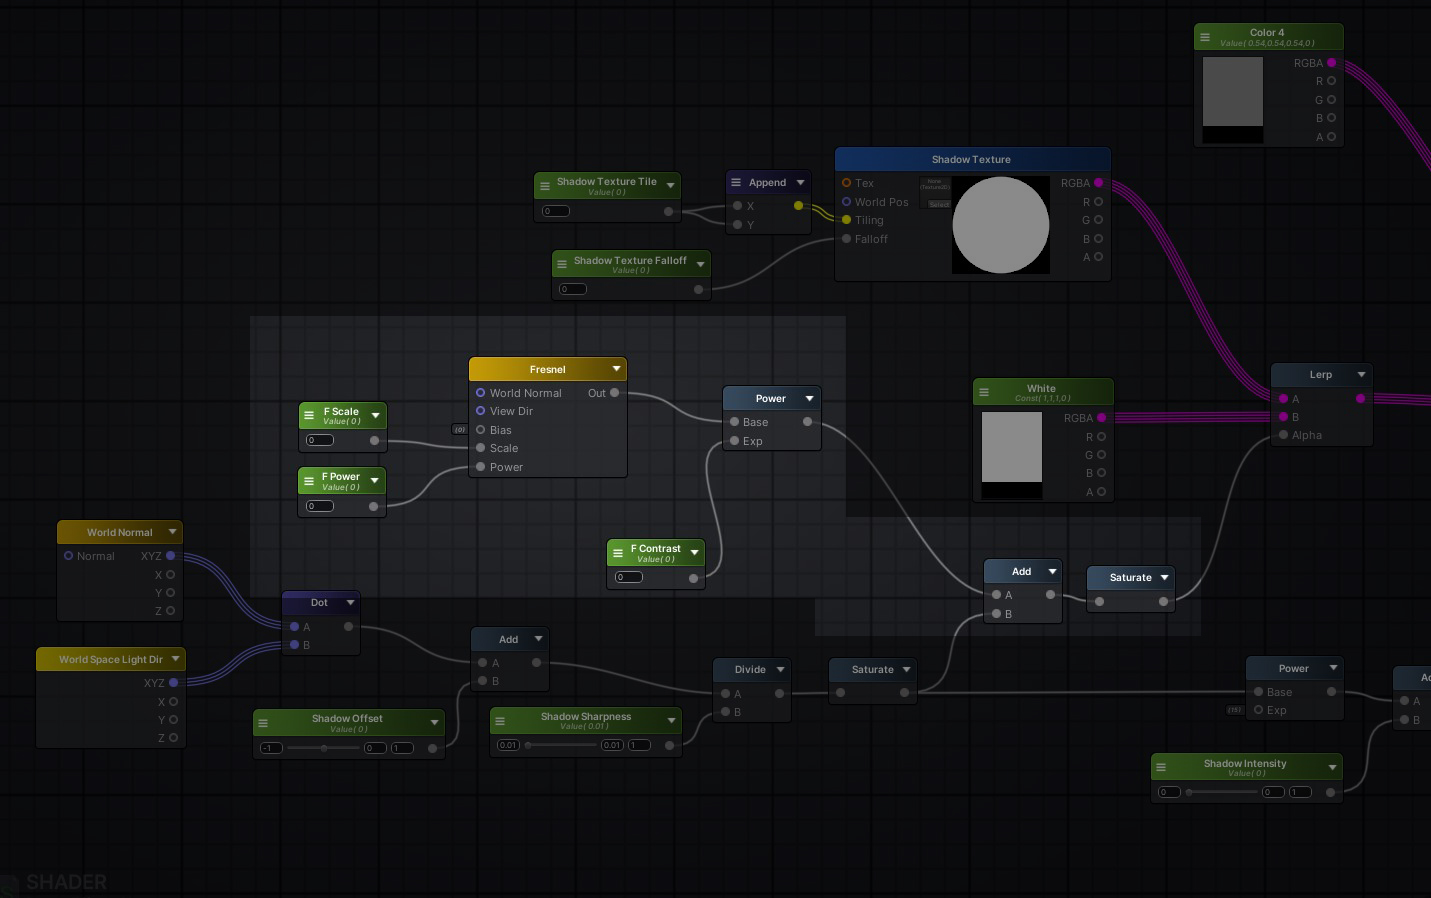
I love fresnels.
And then used a lerp with a new color node after the first color multiply and before the highlight lerp. We now have a rim light in the shadows!
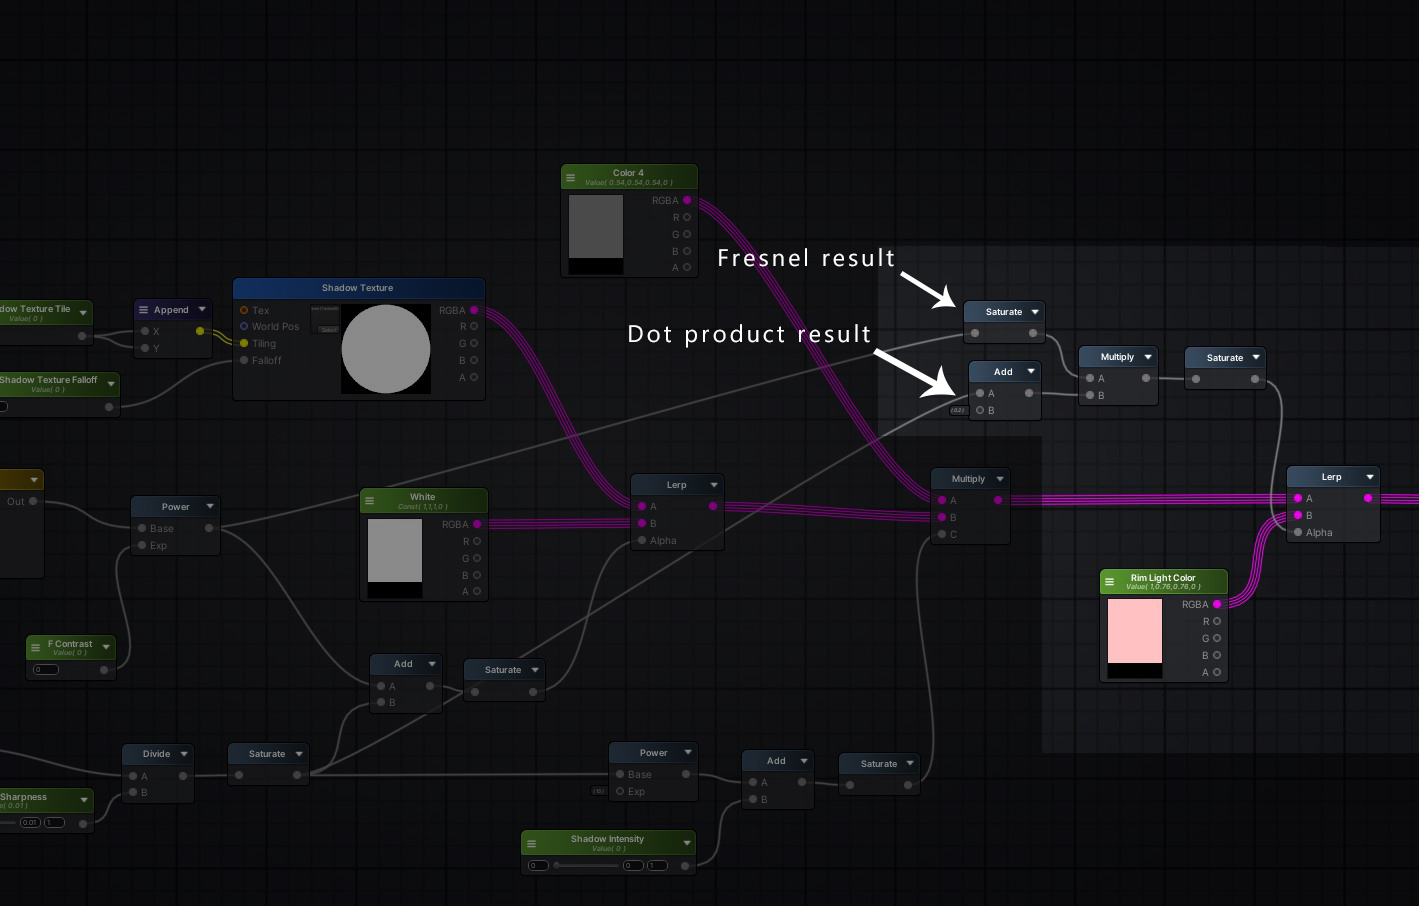
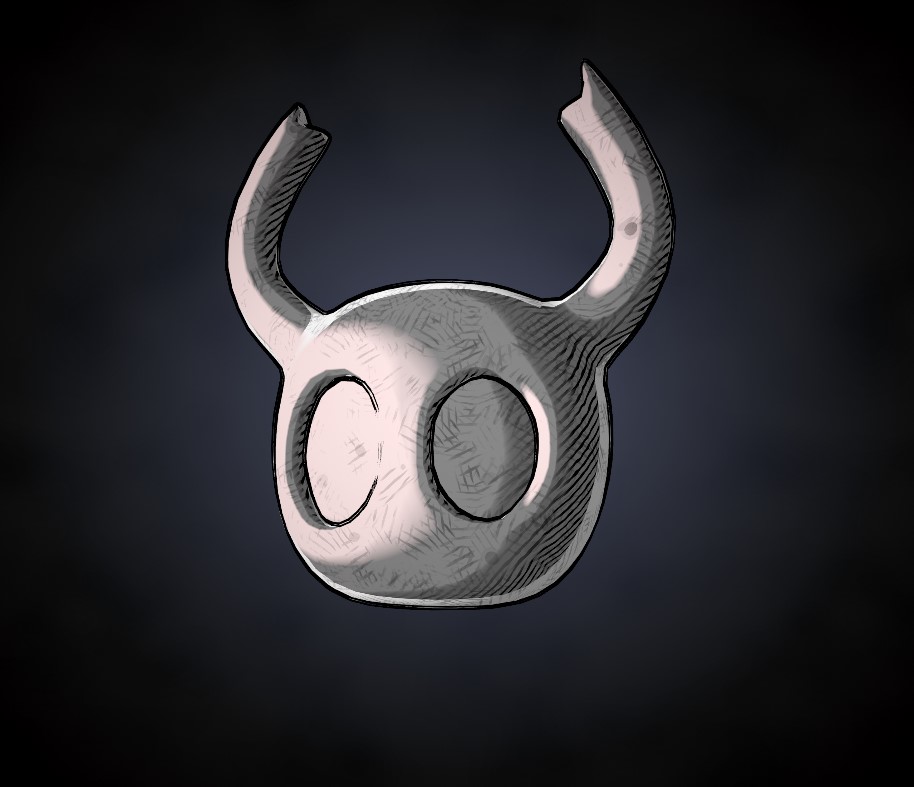
You also love fresnels.
And that concludes this shader breakdown! Here is a full image of the shader below.
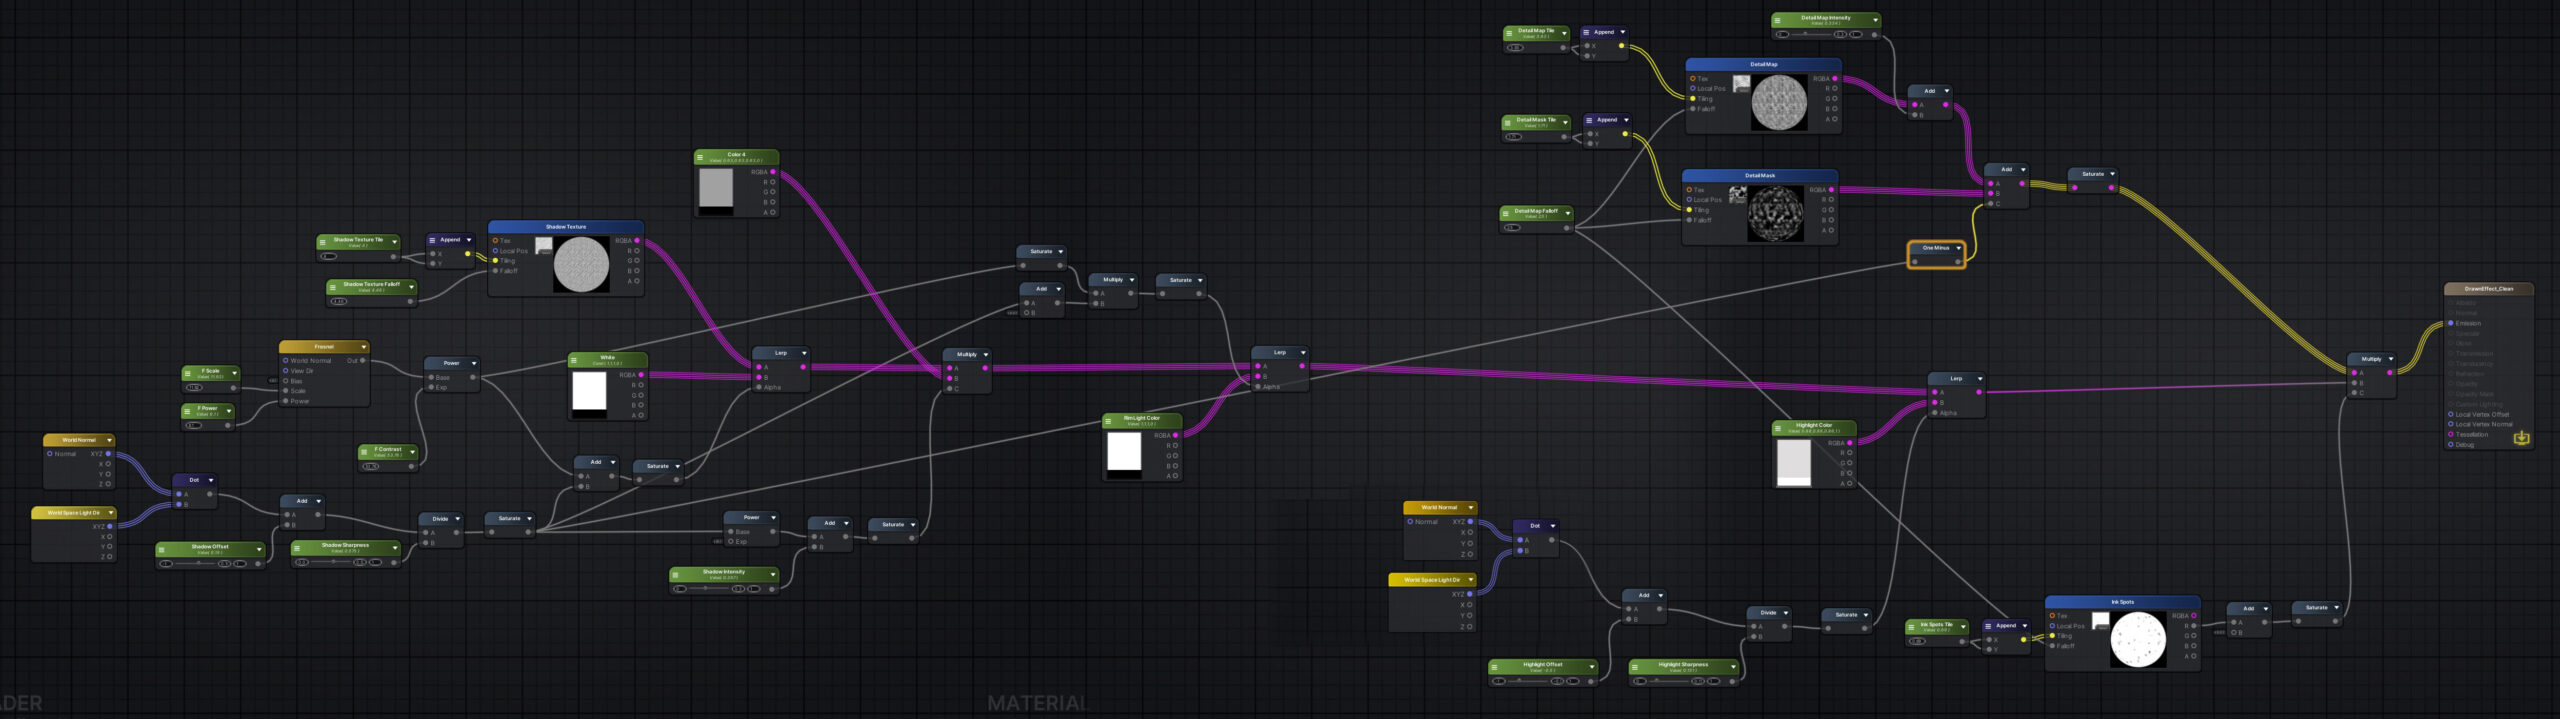
Wow!
Thanks a lot for reading that breakdown, let me know if you enjoyed it!
I'm pretty sure some stuff could be done differently or optimized, but my goal with that was to create 3D illustrations, not to use during a game production.
To make the textures I used substance designer, it was a great tool until it was bought by adobe. I still got my perpetual license, otherwise I wouldn't even use it.
To end this blog post, here are a couple of 3D illustrations I made using that shader!

That's it from me! Squeak to you soon.
👋🐁