This blog post was part of an old breakdown I made a few years ago, I'm reposing it on my website now! You can check the 3D model here.
In this article I'll talk about my texturing process for this project. I started by gathering visual references for the style I would be aiming for:
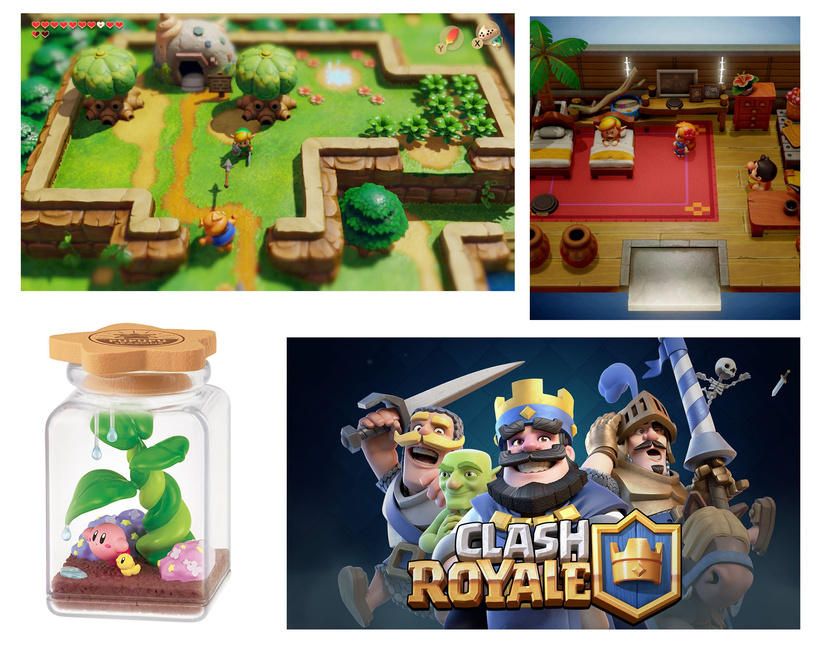
I decided to go with a flat color look, like in Clash Royale but with a bit more surface details variations and realistic reflections to get the plastic toy feeling. Since the diorama is in a dungeon and the lighting will be very dim, I need to have a bit of reflections in the scene to feel the volumes.
I wanted to use only one texture for this model, so I decided to unwrap all the UVs into one map only:
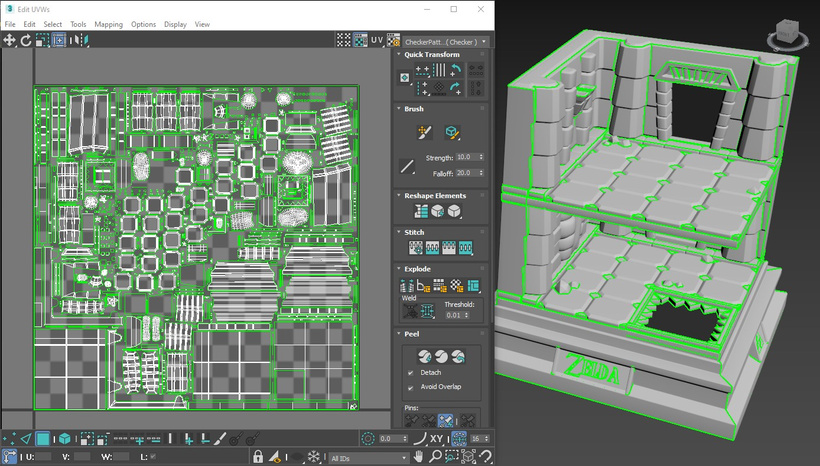
I know it seems a bit... NOT OPTIMIZED. In hindsight maybe I could've stacked a couple of items on top of each other. It made sense for the process I was going to follow later though.
It's a bit difficult to have a single high-resolution map without using a large texture but since I choose to model all my details direclty and not use a normal map, it'll still look sharp. I don't need to have a huge resolution for the base color either. In the UVs, I scaled down the parts that were less important: the walls on the back of the diorama and under the floors, since it'll be mapped on a flat color. For this project I will use a 2048x2048 texture size for the environment.
Now that the UVs are done I'm creating a few masks to use for texturing in Substance Painter. These won't be exported into Unity.
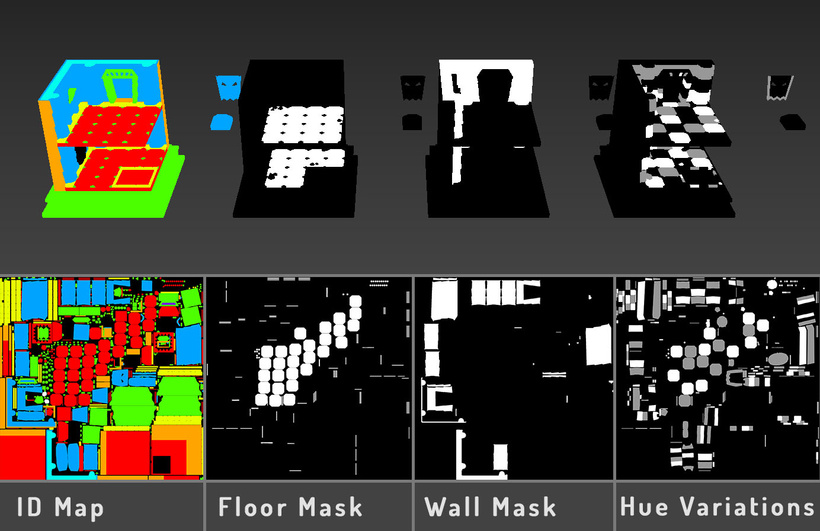
I made these maps in 3Ds Max: I applied flat colored materials to duplicates of my mesh and rendered the colors on a texture map.
• ID Map will be used to separate the different material zones.
• Floor Mask to apply a pattern on the floor slabs only.
• Wall Mask to apply a pattern on the walls only.
• Hue Variations to set color variations at the end of the texturing process.
Now that all the masks have been created I can start working on the textures. I like using Substance Painter for stylized projects because it allows you to get fast result and you can achieve an almost hand painted looks (I also have an old license I purchased in 2015 and kept updated... when subscriptions didn't exist for it).
The first thing I do in Substance Painter, after importing the texture masks and mesh, is to bake the different maps available: normal, world space normal, ambien occlusion, curvature and position. Since I don't have a high poly mesh I checked the "Use Low Poly Mesh as High Poly Mesh" option. Even if I won't use them on the final model, I need to bake those maps to get the weathered effects materials to work.
Usually I don't need a specific cage to bake maps in Susbtance, even more when I'm using the same mesh as High Poly Mesh.
Disclaimer: I'm not going to explain how to use Substance Painter in this blog, just describe my process.
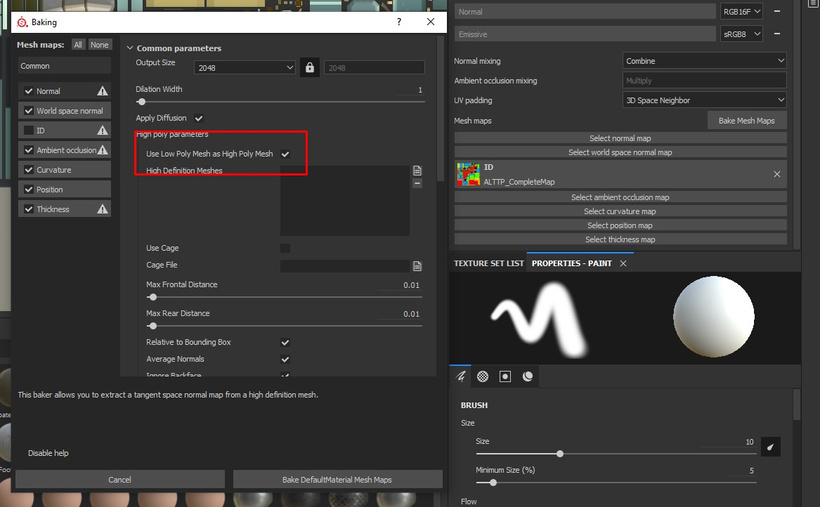
Not checking the ID map because I have one already!
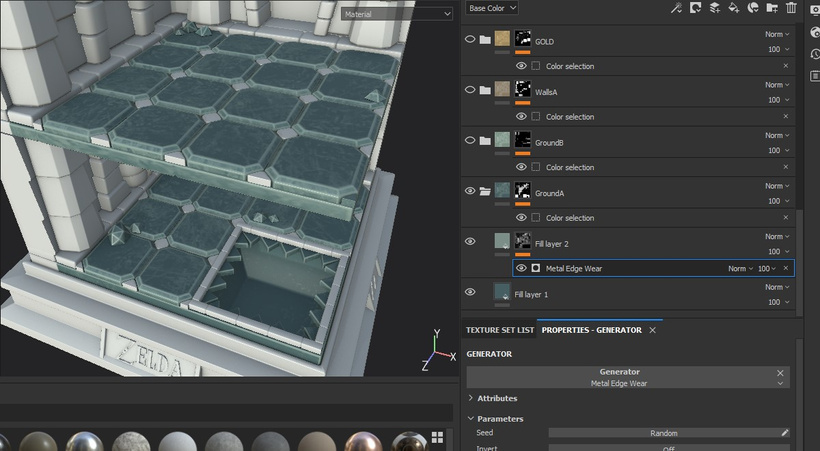
To begin the texturing process, I apply a flat color, and a second one, lighter but with a Generator. I choose the Metal Edge Wear to get a nice weathered effect and also some visual noise on the top part of the slab.
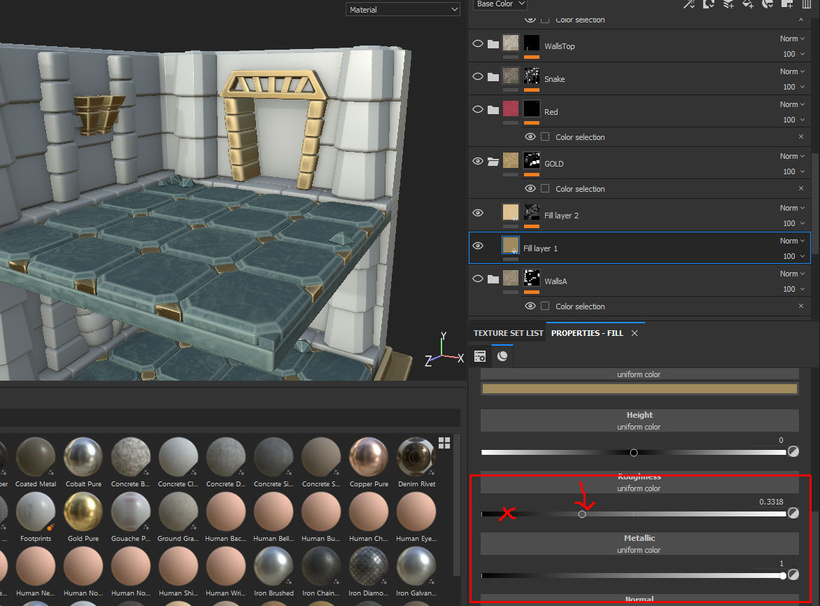
For the gold part, I did the same process, but instead of having a realistic reflection on the metal I just pushed the roughness slider a bit to the right side, so the reflecthions looks more like a shiny plastic, and less like real metal, to make it feel more like a toy with a metallic paint.
I repeated the same for all the different parts of the diorama until I got this nice base:
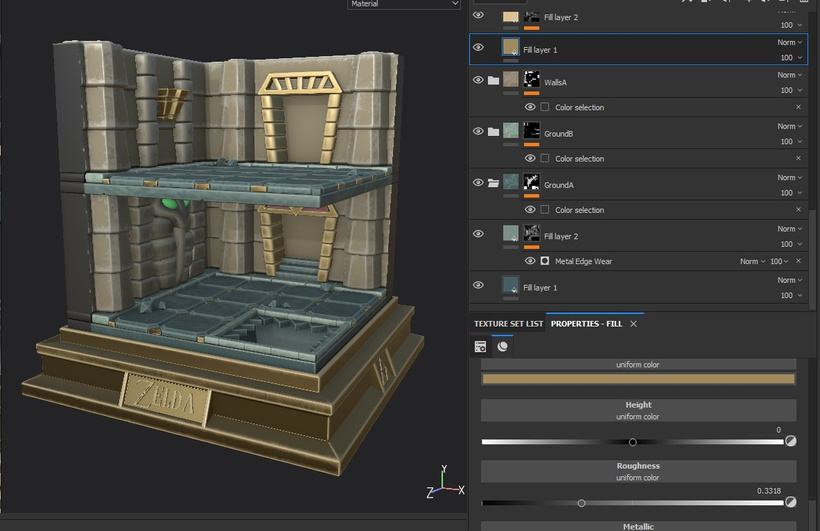
Looks cool!
Now the model is just missing a bit of color variations, and small adjustments since the rendering in Substance is very different from the scene in Unity.
To create variations I made 2 textures using Substance Designer but you can use any software or download grunge/pattern textures, it doesn't have to be very fancy since it's just used to add more surface details in the base color.

Make them less of more visible according to your taste.
I used these masks to add small hue and brightness variations on the floor and walls. For the global model color adjustment I used the "hue variations" mask I previously made in 3dsMax to add hue and brightness variations to the texture. I usually do a lot of back & forth between Substance and Unity since the Substance viewport and Unity game view doesn't look the same at all.
I am not going to talk about the textures export in this post since it's linked to the shader I am going to build in Unity.
That's it for the texturing. The next part will be about shaders!
Bye-bye 👋🐁