This blog post was part of an old breakdown I made a few years ago, I'm reposing it on my website now! You can check the 3D model here.
Second part of the diorama breakdown! In this article I'll go into more detail on how I modeled the environment.
Environment Modeling
Before hopping into modeling anything, I always think about the visual end goal for the model: I knew I wanted a somewhat realistic lighting and have my model look like a real life toy. I also knew I wanted the model to be in a WebGL viewer, wanted most of my details coming from the modeling. When you look at plastic figures most of the details comes from the surface details.
I also decided I wouldn't use a normal map to reduce the number of textures, the 3D model would need to be a bit more detailed so it doesn't look too low poly. To help me, I used a tool called "Surface Weighted Normals" for 3DSMax (You can find a couple online, this one). There is a Weighted Normal modifier in blender to achieve the same look.
Here is an example of what the tool does, it's recalculating the vertex normals so they give a sharper look to any bevel you do:
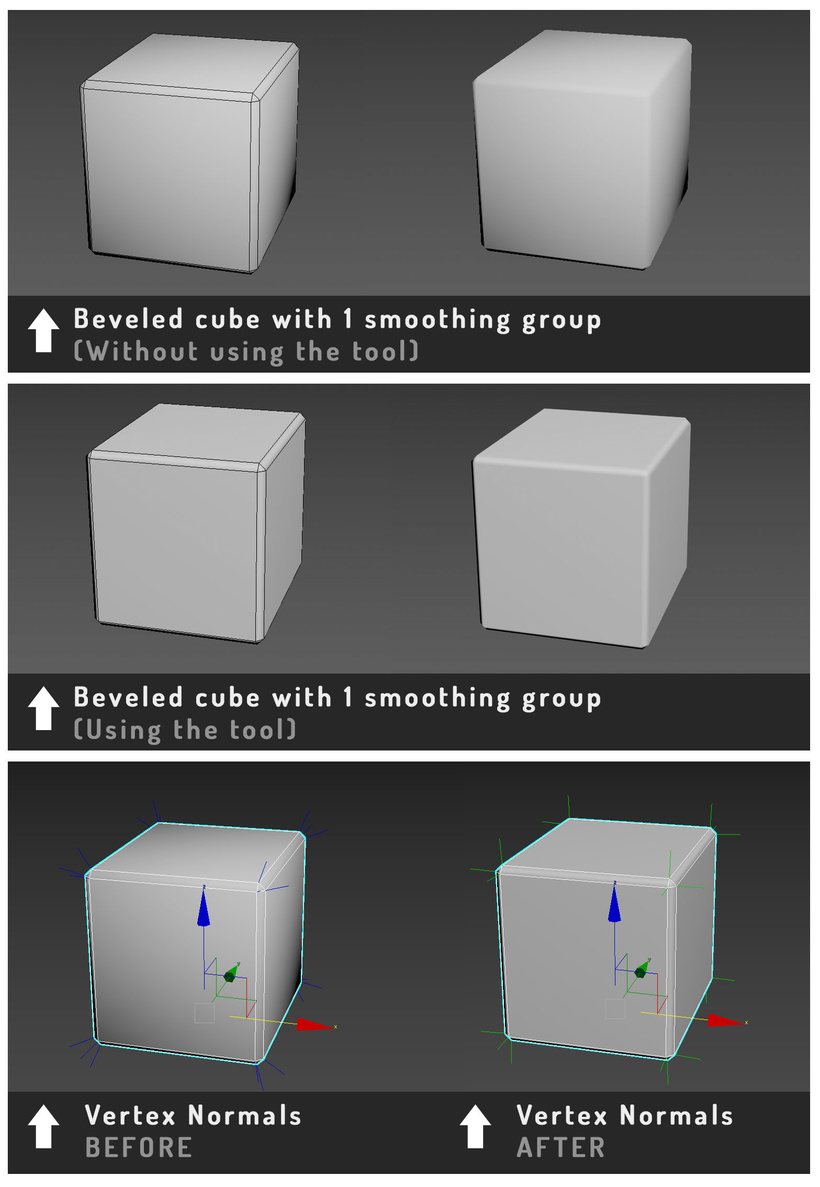
Forgive me for using the term "smoothing group", this is specific from 3ds Max.
This is how I can achieve a sharp look on my model without using a normal map
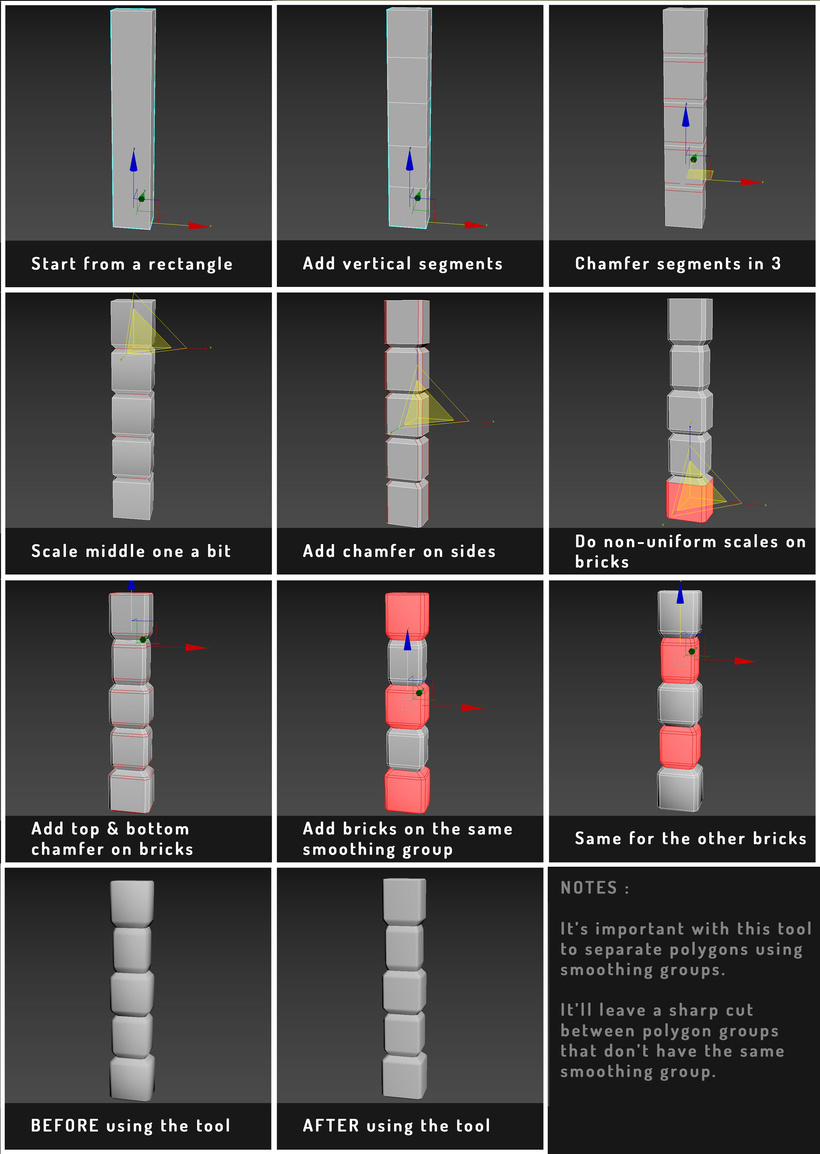
Here is a step by step of my modeling process showing a visual breakdown of a pillar:
Smoothing groups have a different name in Blender, you can find more info here, a good article that explains how vertex normals visualy works. This video is also agreat explanation on how it normals works and affects your model visuals. Understanding normals on a 3D model is as important as the modeling part, as it will affect your final render.
What you would be looking to do in Blender:
- In edit mode, select all faces on your model
- Right click and select "Shade Smooth"
- In edge mode, select the edges where you want a clean cut in the shading
- Right click and select "Mark Sharp"
- Apply the "WeightedNormal" modifier to your mesh and enable "Keep Sharp"
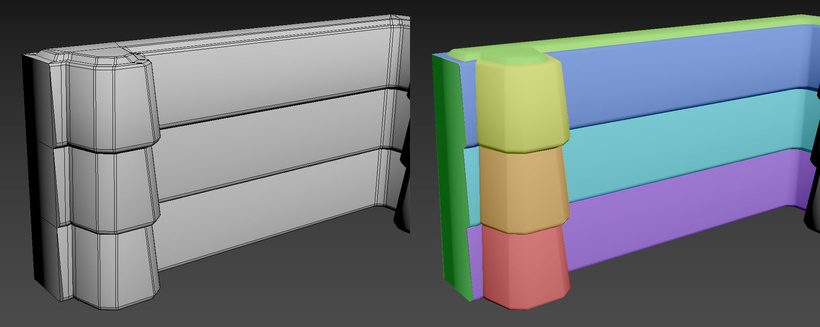
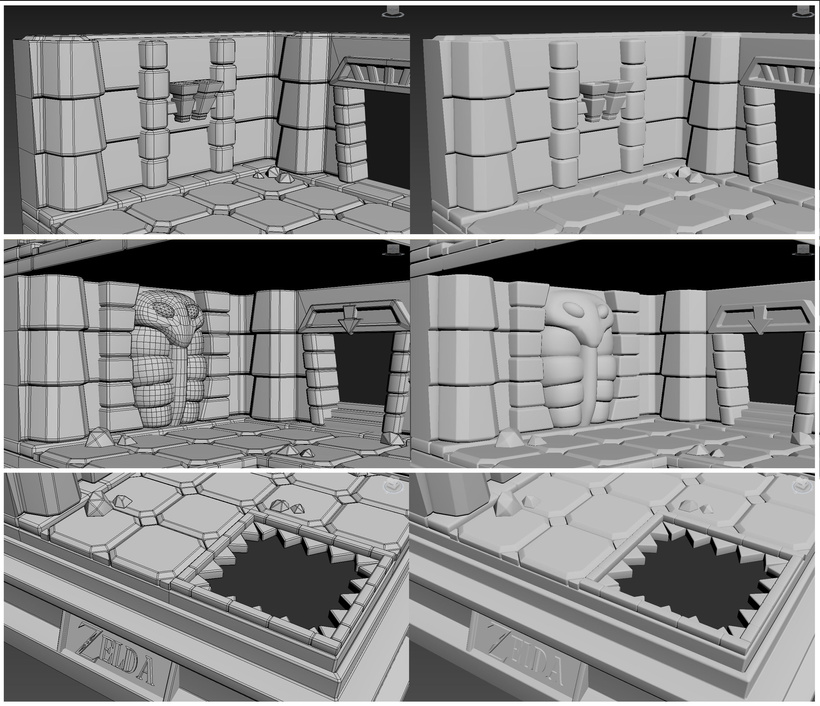
I applied the same modeling technique to everything in my diorama. Here is an example from a wall piece where I used different colors to highlight how the normals were split amongst the wall geometry.
When modeling this environment I had to keep in mind that it was supposed to look like a real model figure. I made sure that my model was constructed with solid parts, as if it was poured into a mold.
It was a bit more complicated to keep the ground in one piece, I used a square base, a large trim on the side where the walls are, 2 brick trims with volume, and smaller tiles to create the floor. Since all the different elements are detached it looks more detailed (I would do it a bit differently if I were to build this today).
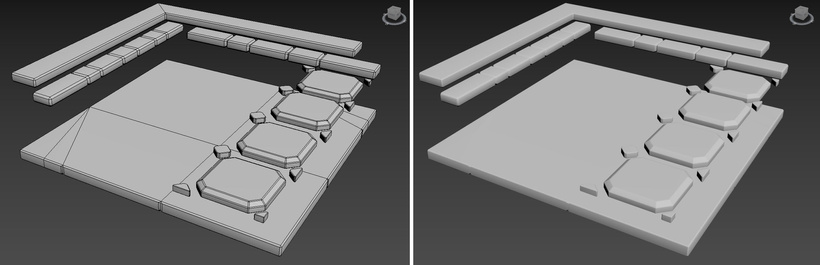
Even if the floor is separated into many pieces, it is easier to modify them and to control how the shading will look like because it's not all fused together in one single mesh.
In the end, with all the bevels and detailing (counting the glass model/door/blocks) the diorama environment had around 22k triangles, which is a correct number considering this is will be one of the only mesh shown on screen.
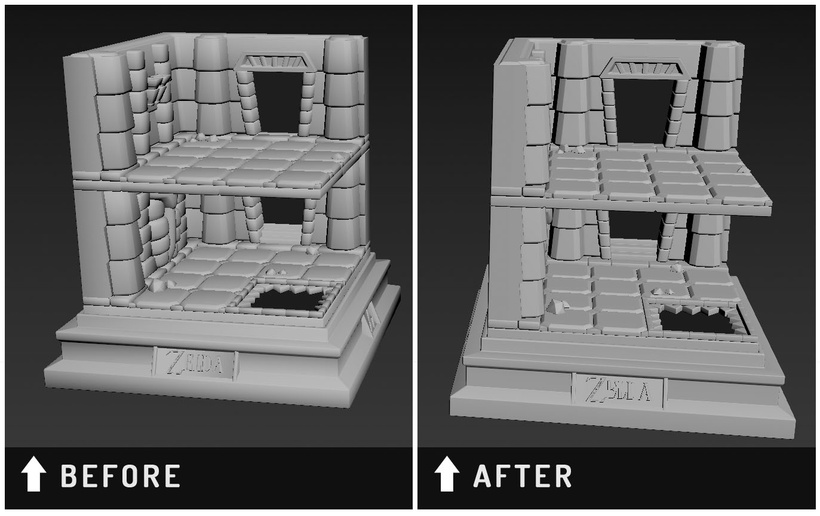
Here are some close ups from the environment modeling:
Wow, so smooth...
If I had to redo this model today, I don't think I would've done this very differently. Maybe I would've optimized some bits a bit more, but the overall ideal of having all the details in the 3D model and leave only one texture for the whole model is the smartest choice for my kind of workflow. I prefer to have less textures to deal with and focus on having fun modeling an object!
If I were to change one detail from the ground modeling, I would've avoided doing bevels at the bottom of the floor tiles and trim. That way it could really have looked like it was part of the floor: right now it looks like it's floating above and I like it a bit less. It would have saved a fair amount of triangles as well... I think around 3k at least... YIKES. Well, this model was made in 2020, 6 years old now!
I must resist... I will NOT re-model this scene...
That's it for now, the next part I'll focus on texturing.
Bye-bye 👋🐁